Send a client one of your saved emails in a few clicks. ProperFile fills in the client’s name and details, even the list of documents they still owe you. You add anything personal, and every email you send is kept in the client’s file.
Time needed: about 2 minutes.
Before you start: your email templates are set up in the Admin Panel, for each case type (see the Email templates guide). A template only shows for clients with that case type.
Step 1
Open the client and choose the matter
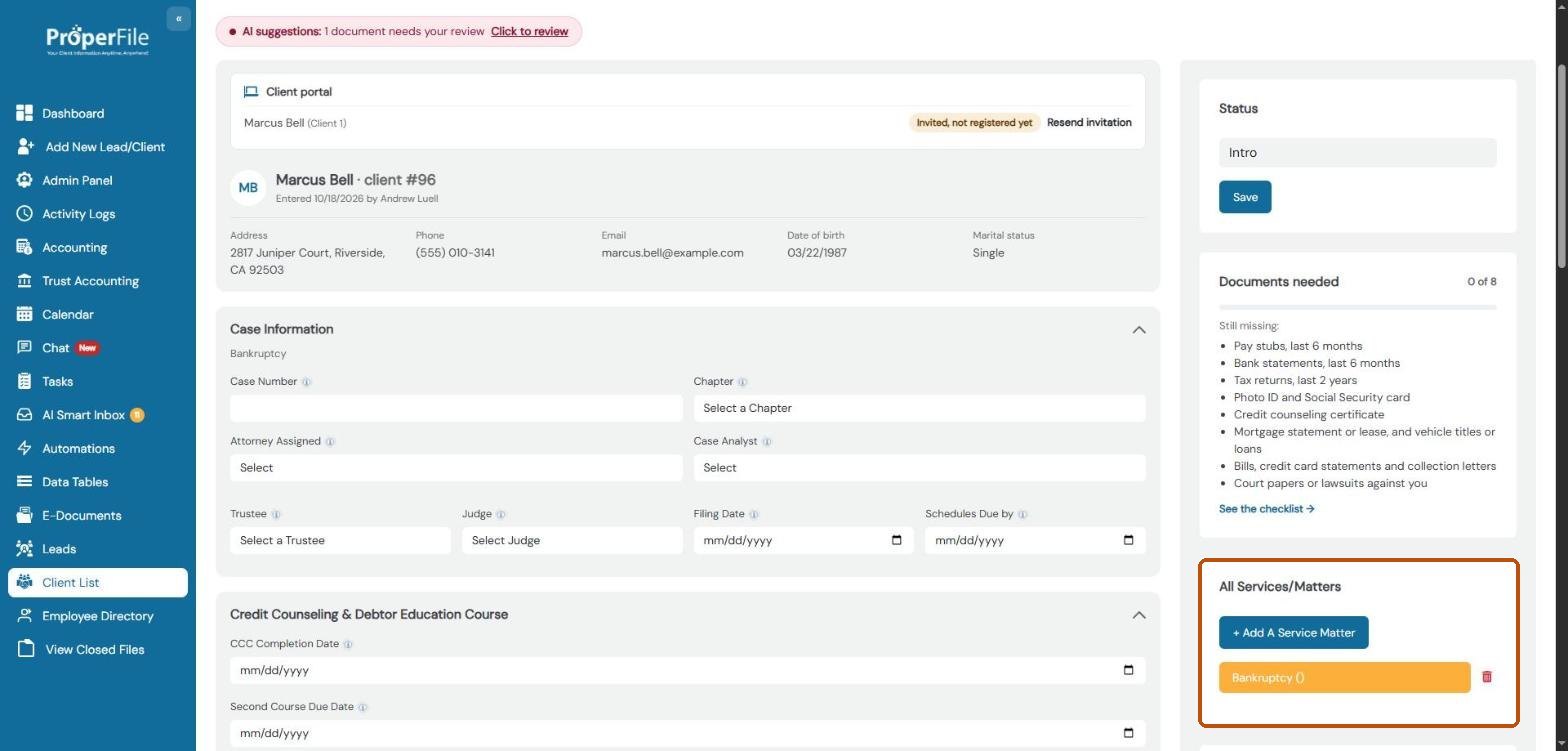
Open the client and, under All Services/Matters, click the matter the email is about. The templates you see depend on that matter’s case type.
Step 2
Pick a template
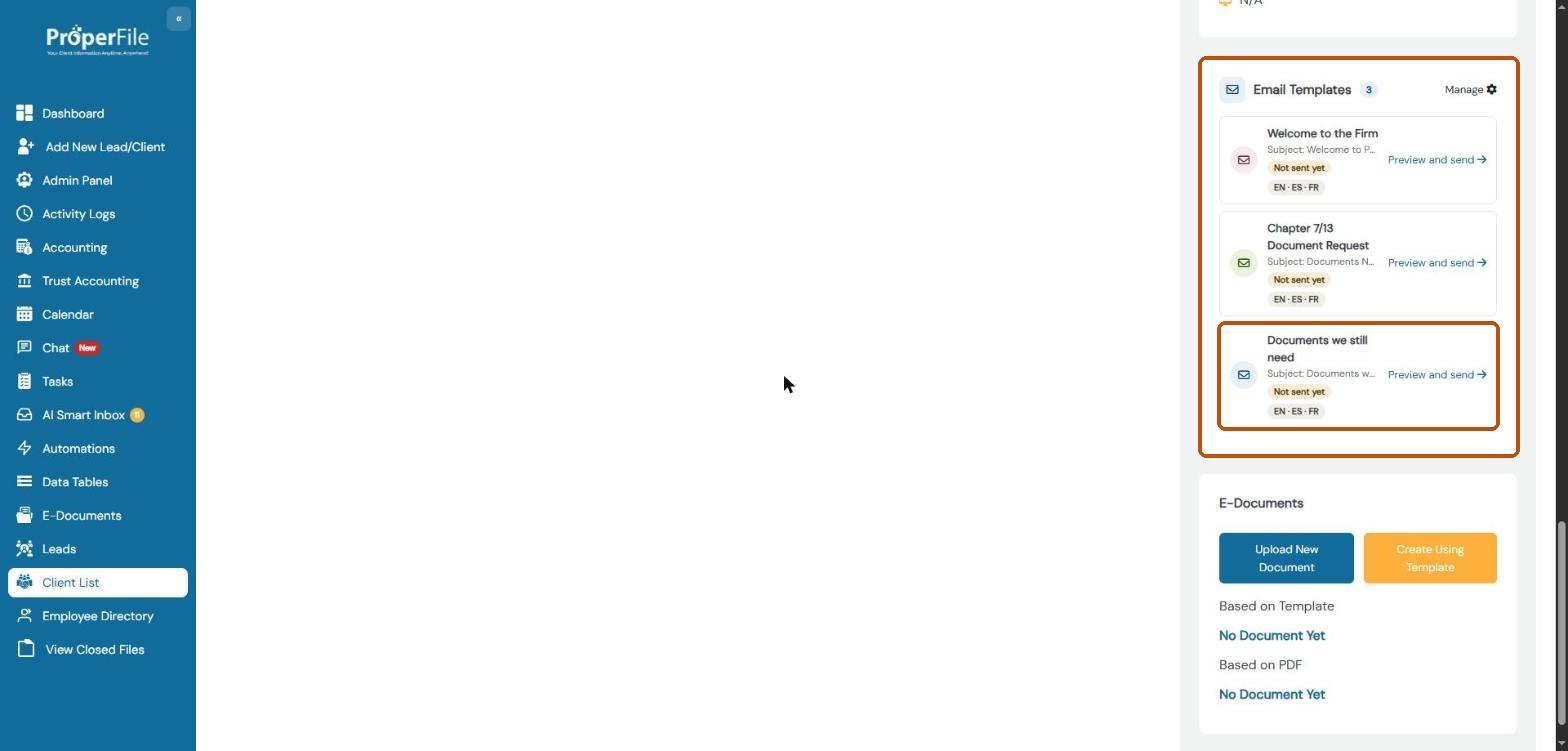
Scroll down the right-hand side to Email Templates. Each template shows its subject, whether you’ve sent it to this client (Not sent yet, or Sent and the date) and the languages it comes in. Click the template, or its Preview and send link.
Tip: click Manage at the top of the panel to edit your templates for this case type.
Watch it: getting a template email ready to send
Step 3
Check who it's from and to
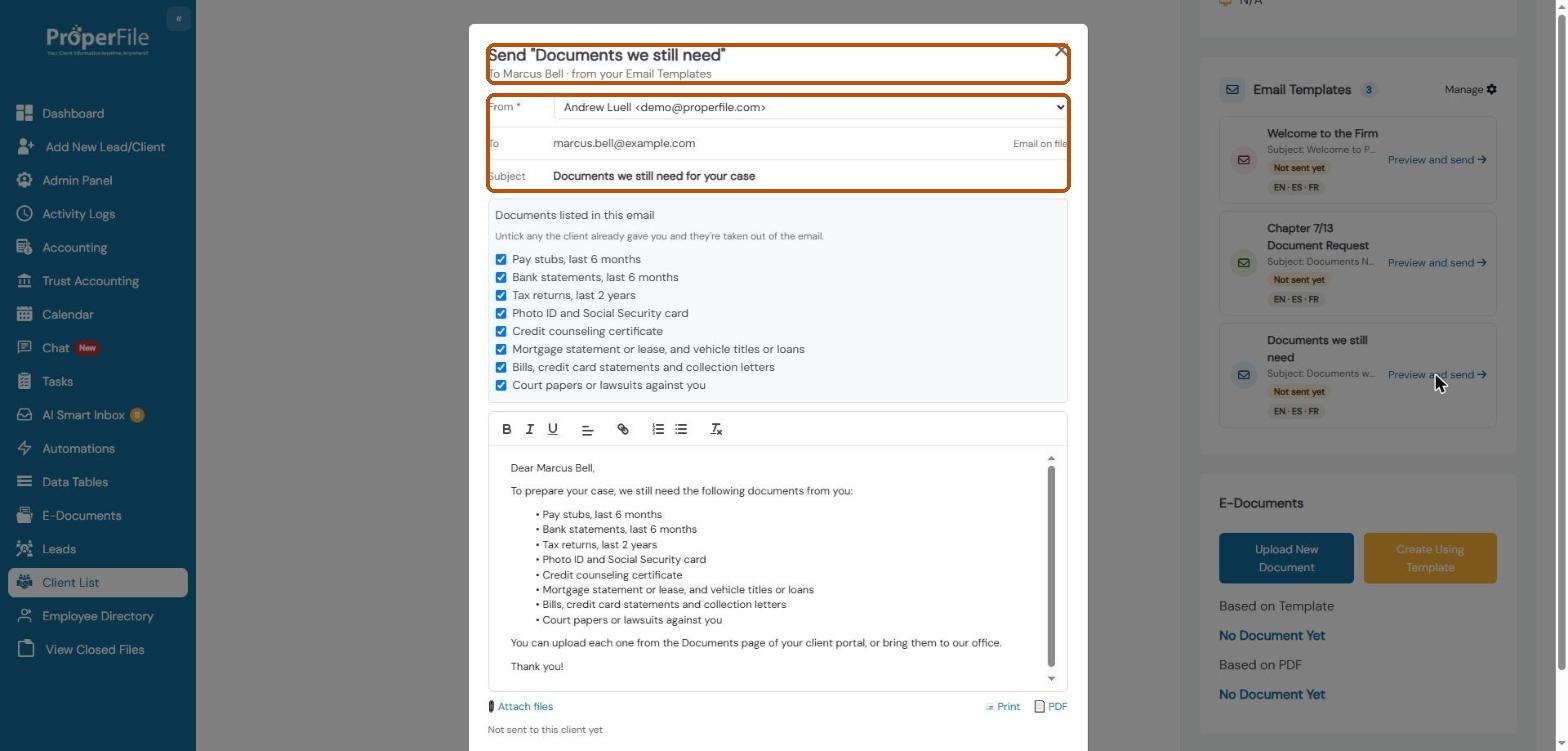
The window shows the template’s name and who it goes to. From is set to you when you’re one of the senders; pick someone else if needed. The email goes out under your firm’s name and is signed with that person’s name and title. To is the client’s email on file, and you can change the Subject for this email. When the client replies, the reply goes to the person in From and to your firm’s email address on the Preferences page.
Tip: if the client’s preferred language is one you offer and the template has been translated, the email opens in that language, with a blue note above it.
Step 4
Choose which documents to list
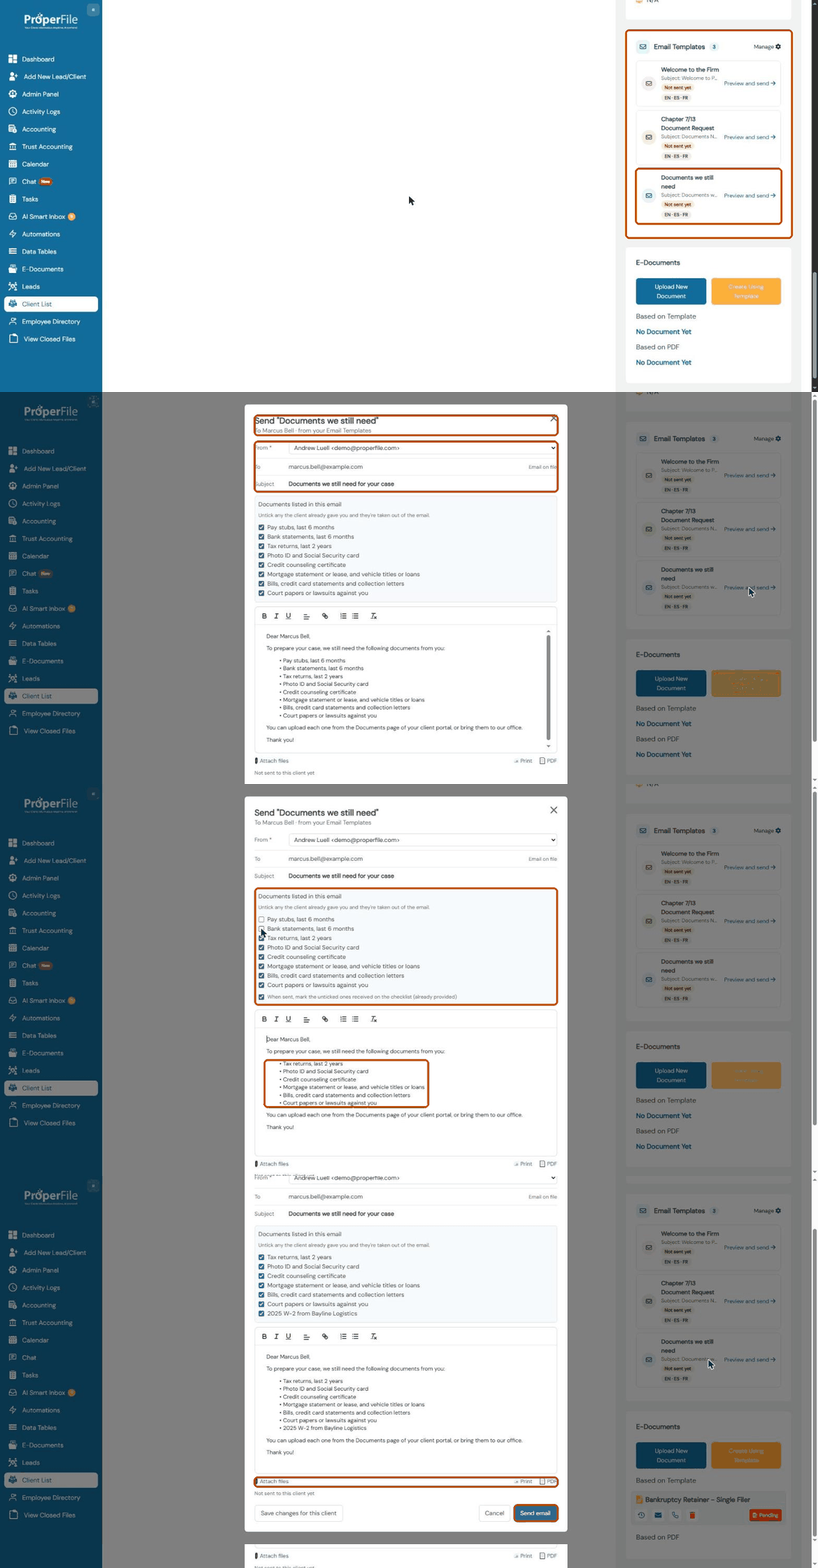
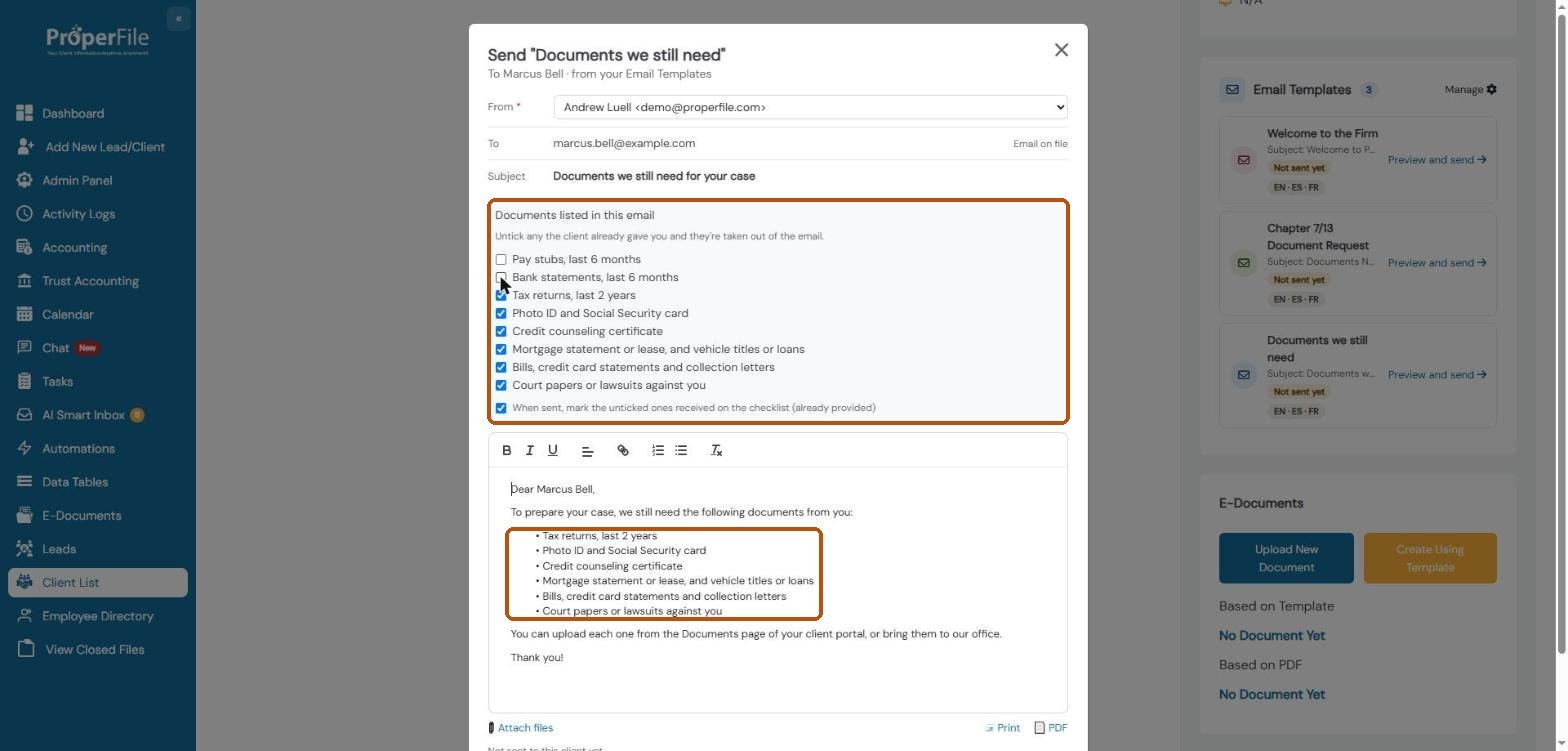
If the template lists the documents you still need, they show under Documents listed in this email. Untick any the client already gave you, and they’re taken out of the email. Leave When sent, mark the unticked ones received ticked to update the client’s checklist too.
Click in the email text to add anything personal. The small toolbar has bold, italic, links and lists.
Step 5
Send it, or save it for later
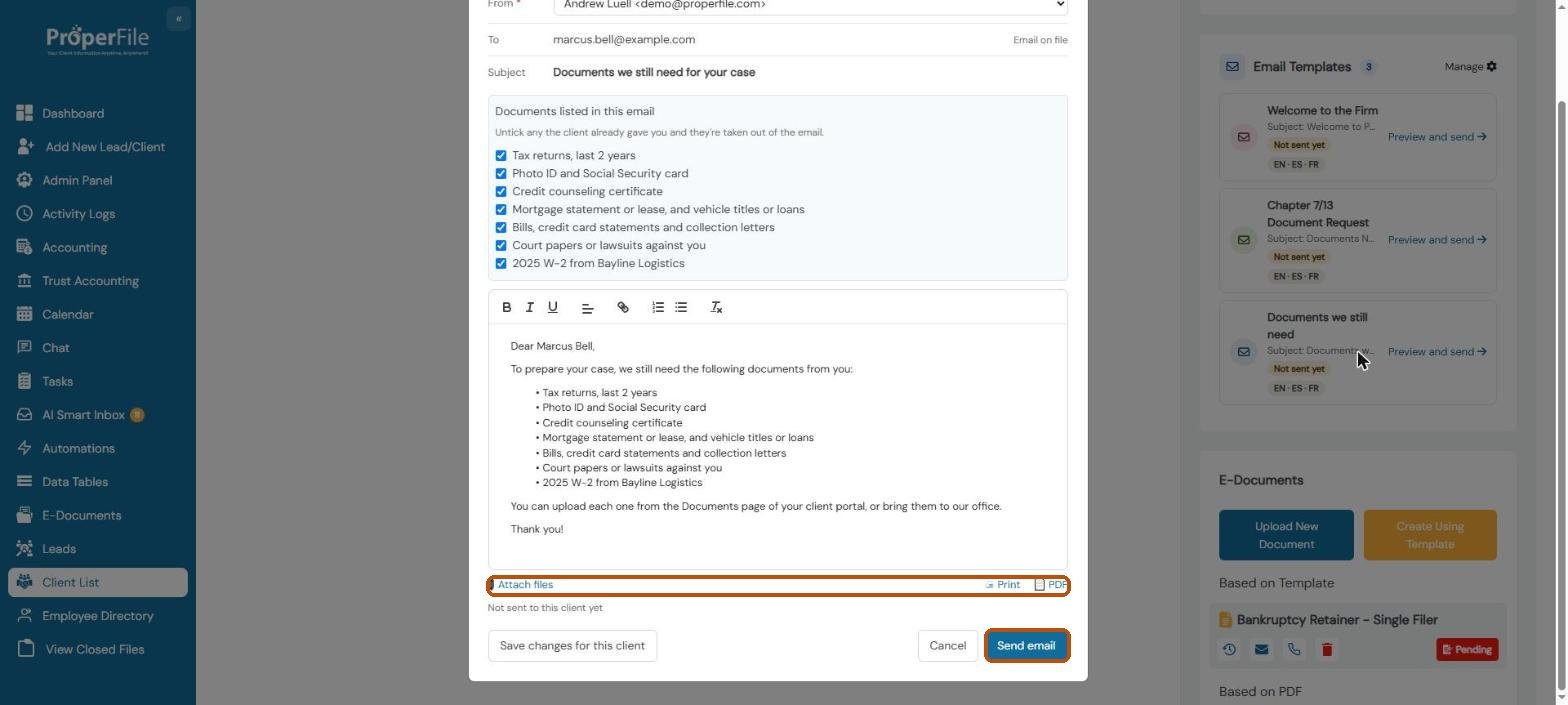
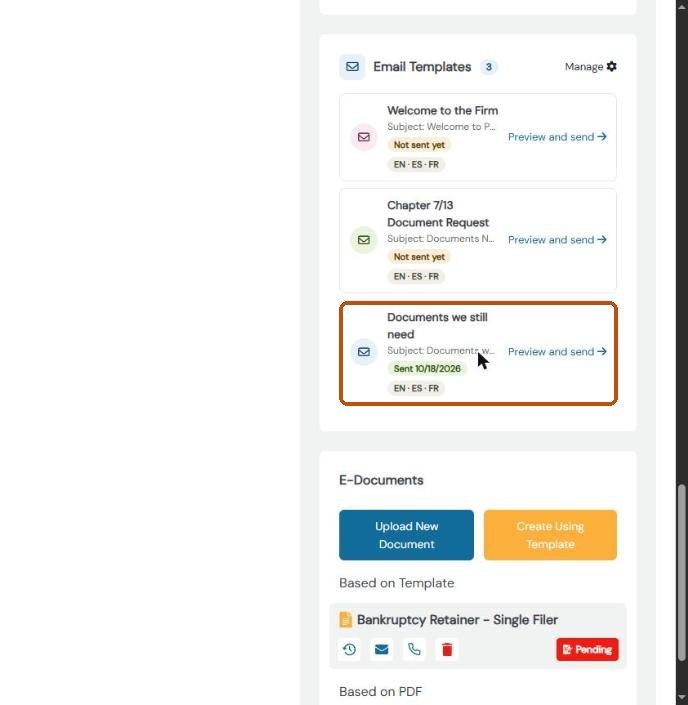
Use Attach files to add attachments, and Print or PDF for a copy. Then click Send email. In the Email Templates panel, the template now shows Sent and today’s date.
Not ready yet? Click Save changes for this client to keep your edited version without sending. Next time you open this template for this client, your version is there.
Step 6
Find the emails you've sent
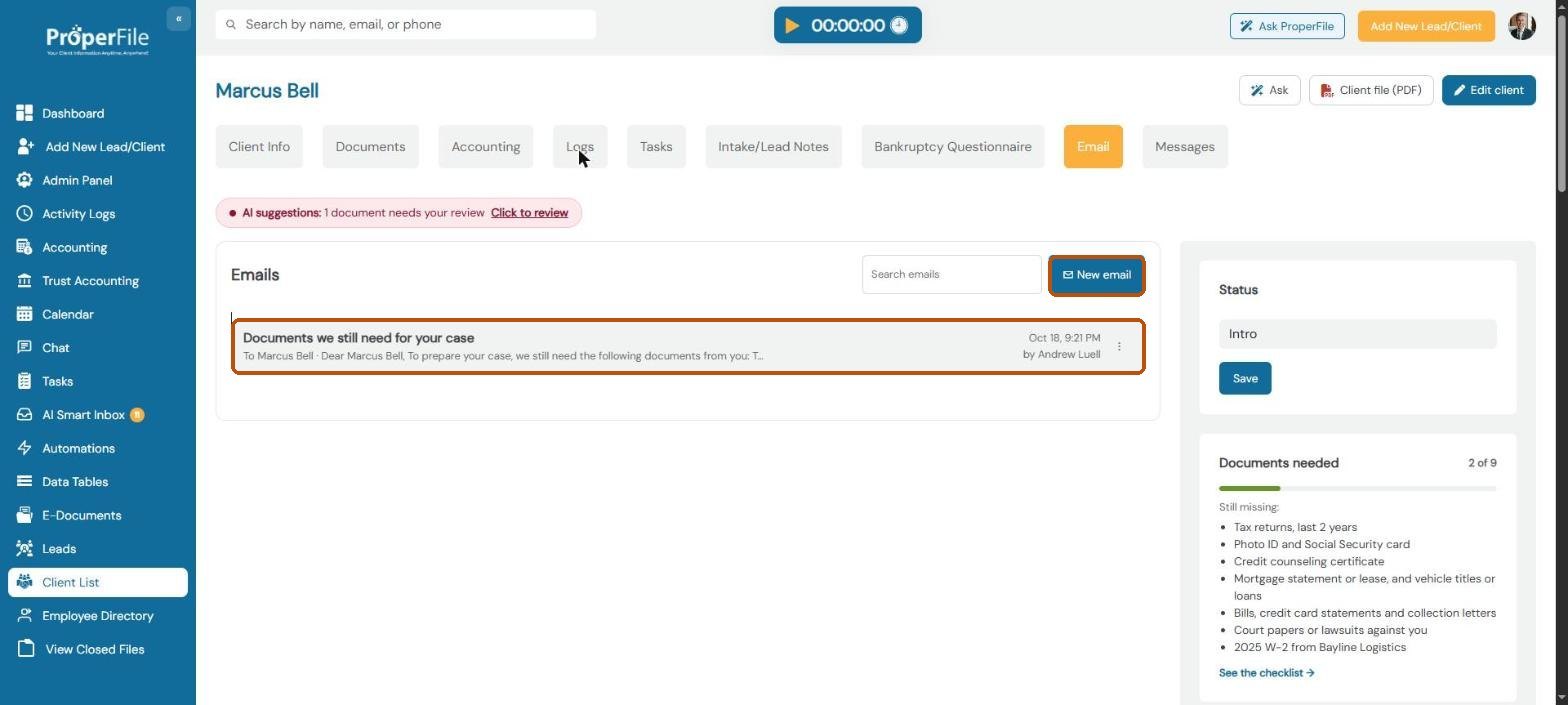
Click the client’s Email tab. Emails lists every email sent from this matter, newest first, with its subject, the start of the text, when it was sent and who sent it. Use the search box to find one, and the ⋮ menu next to an email to View it or Resend it. To write an email from scratch, click New email.