The calendar shows every appointment, court date and blocked day in one place, color-coded by type. You can add a quick event from the calendar, and add appointments and court dates from the client’s page.
Time needed: about 5 minutes.
Step 1
Open the calendar
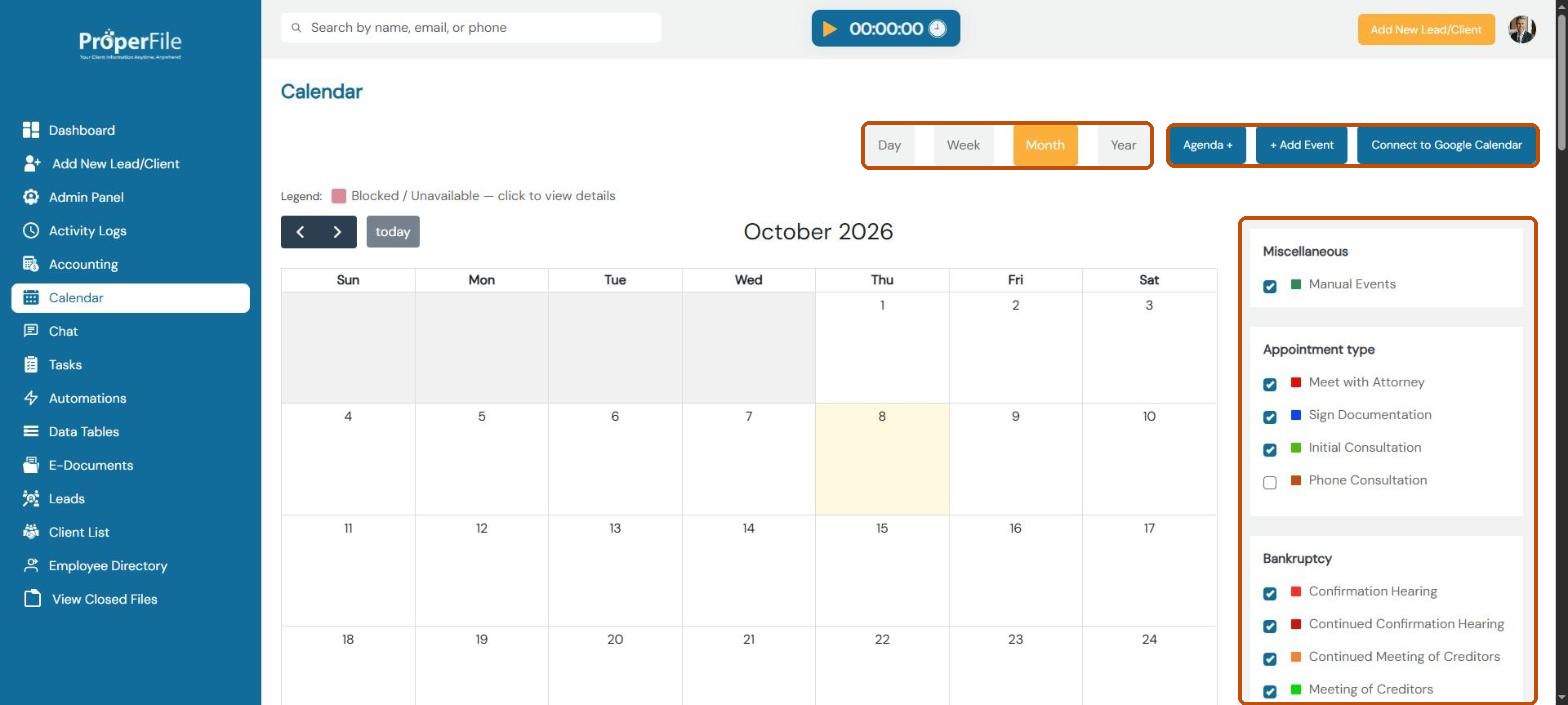
Click Calendar in the left menu. Switch between Day, Week, Month and Year views, and use the arrows to move through dates. On the right, untick any appointment or hearing type to hide it.
Tip: click Connect to Google Calendar to see your ProperFile events in Google Calendar too. Blocked days show in pink; click one to see why it’s blocked.
Step 2
Add a quick event
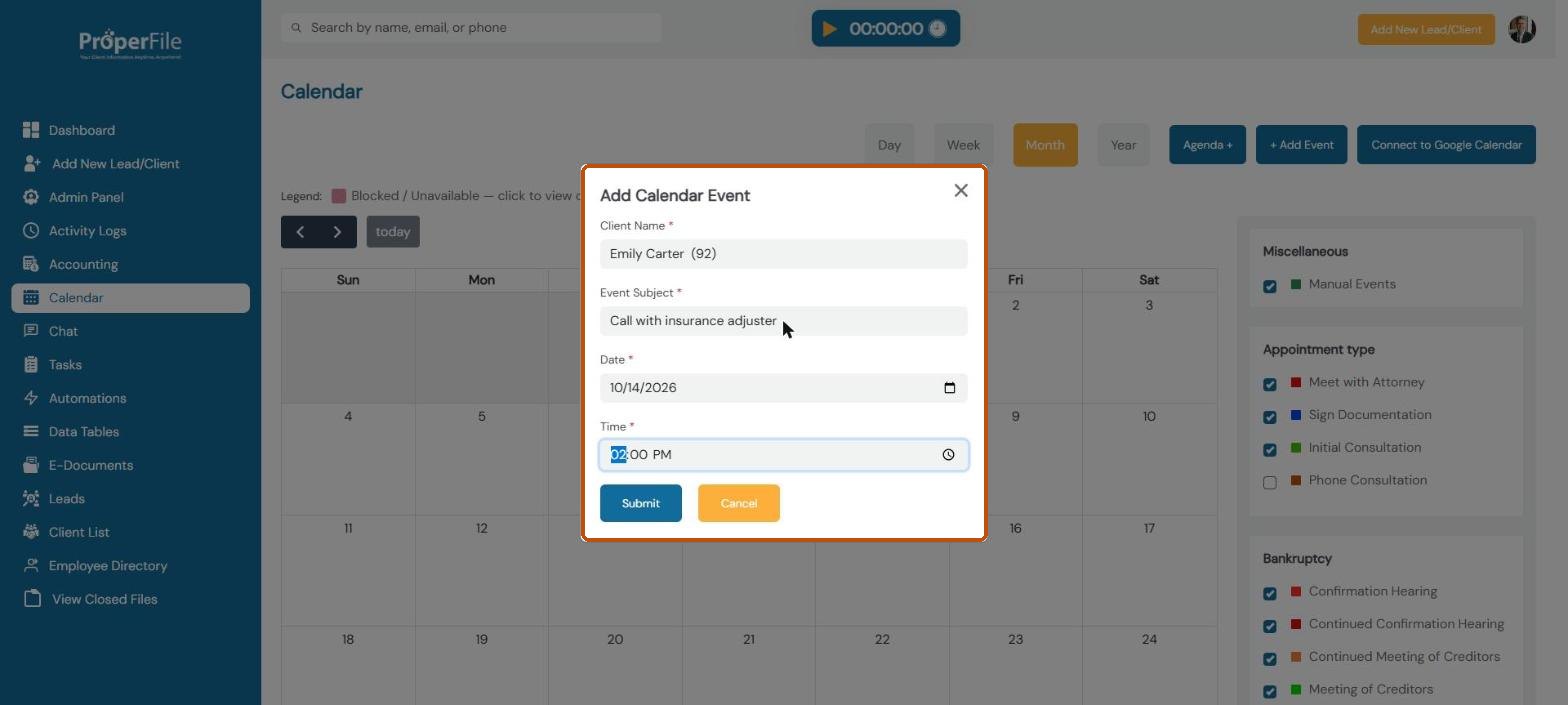
Click + Add Event. Pick the client, type a subject such as Call with insurance adjuster, set the date and time, and click Submit.
Step 3
Schedule an appointment from the client’s page
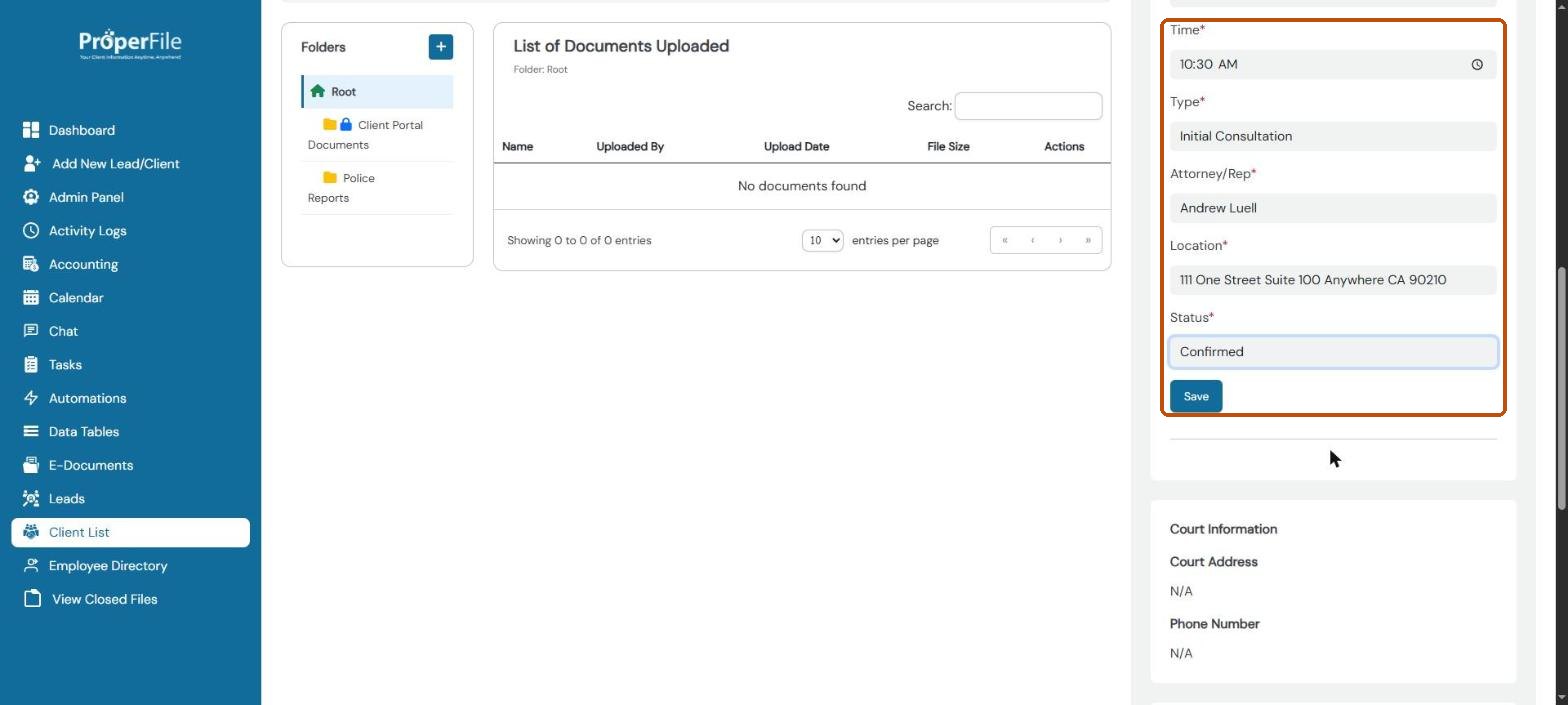
Open the client and find Appointments on the right. Set the date and time, then choose the appointment Type, the attorney, the office Location and the Status (Confirmed, Rescheduled, Canceled or Flaked). Click Save.
Step 4
Add a court date
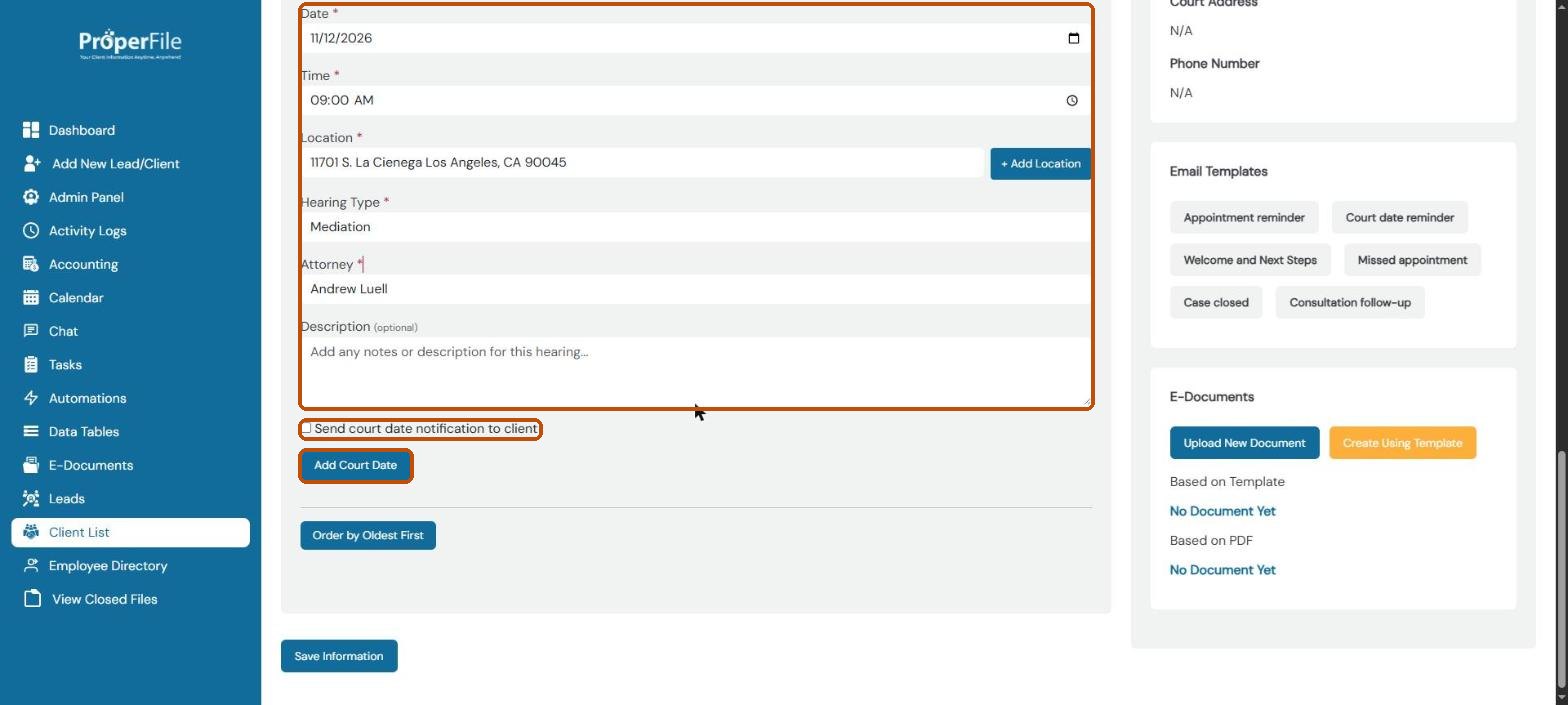
On the client’s Client Info tab, scroll down and open Event/Court Date. Set the date and time, choose the court Location (or click + Add Location), the Hearing Type and the attorney, and add an optional description. Tick Send court date notification to client to email the client about it. Click Add Court Date.
Tip: hearing types and their colors are set up in the Admin Panel, under Hearing Types.
What’s next
Keep going
Next, record your time and bill clients in Time entries and invoices. All guides are in the Help Center.