Every payment is recorded against an invoice. Split an invoice into a payment plan, record cash and check payments as they come in, and take card payments through LawPay.
Time needed: about 5 minutes.
Before you start: to take card payments, connect your LawPay account first (see the Connecting LawPay guide). You also need an invoice for the client (see the Time entries and invoices guide).
Step 1
Open the invoice
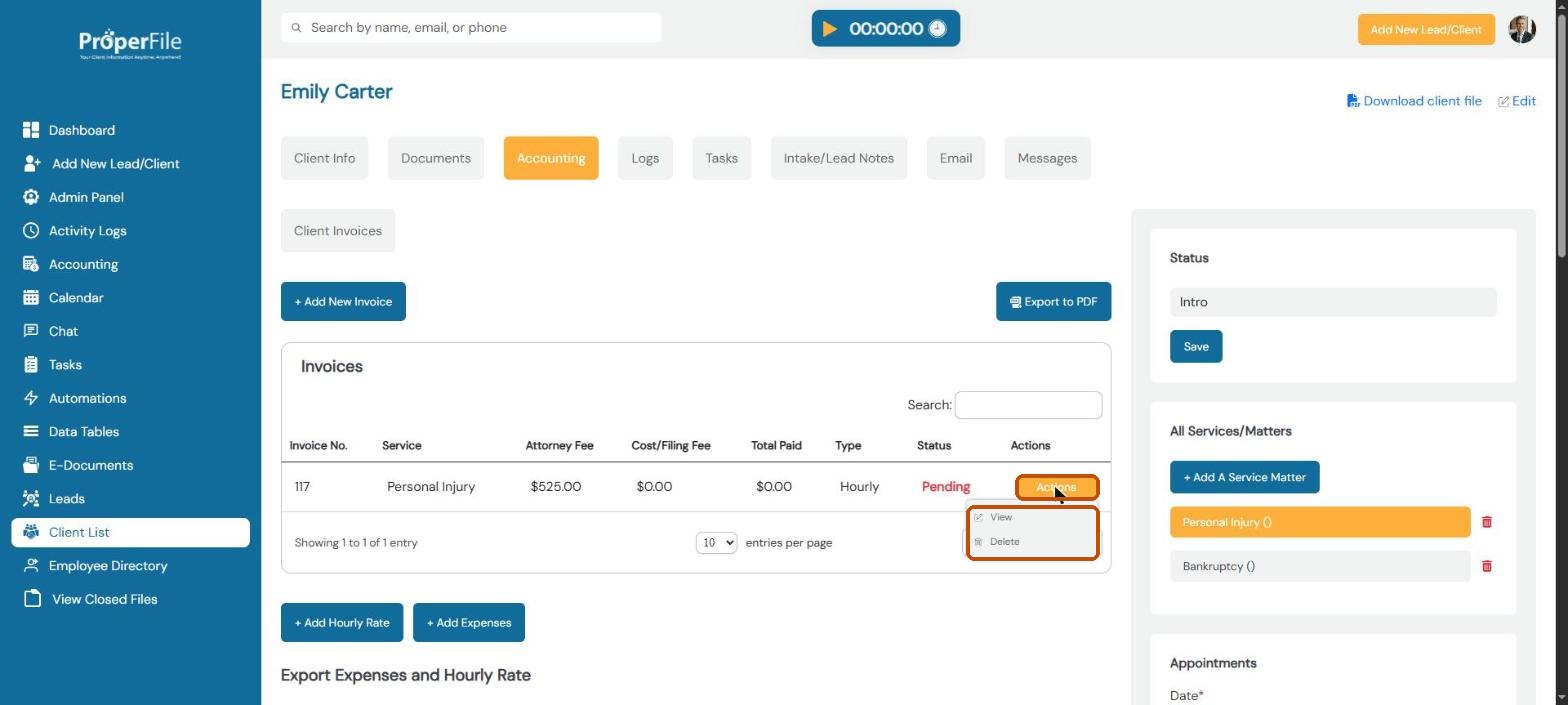
On the client’s Accounting tab, click Actions next to the invoice and choose View.
Step 2
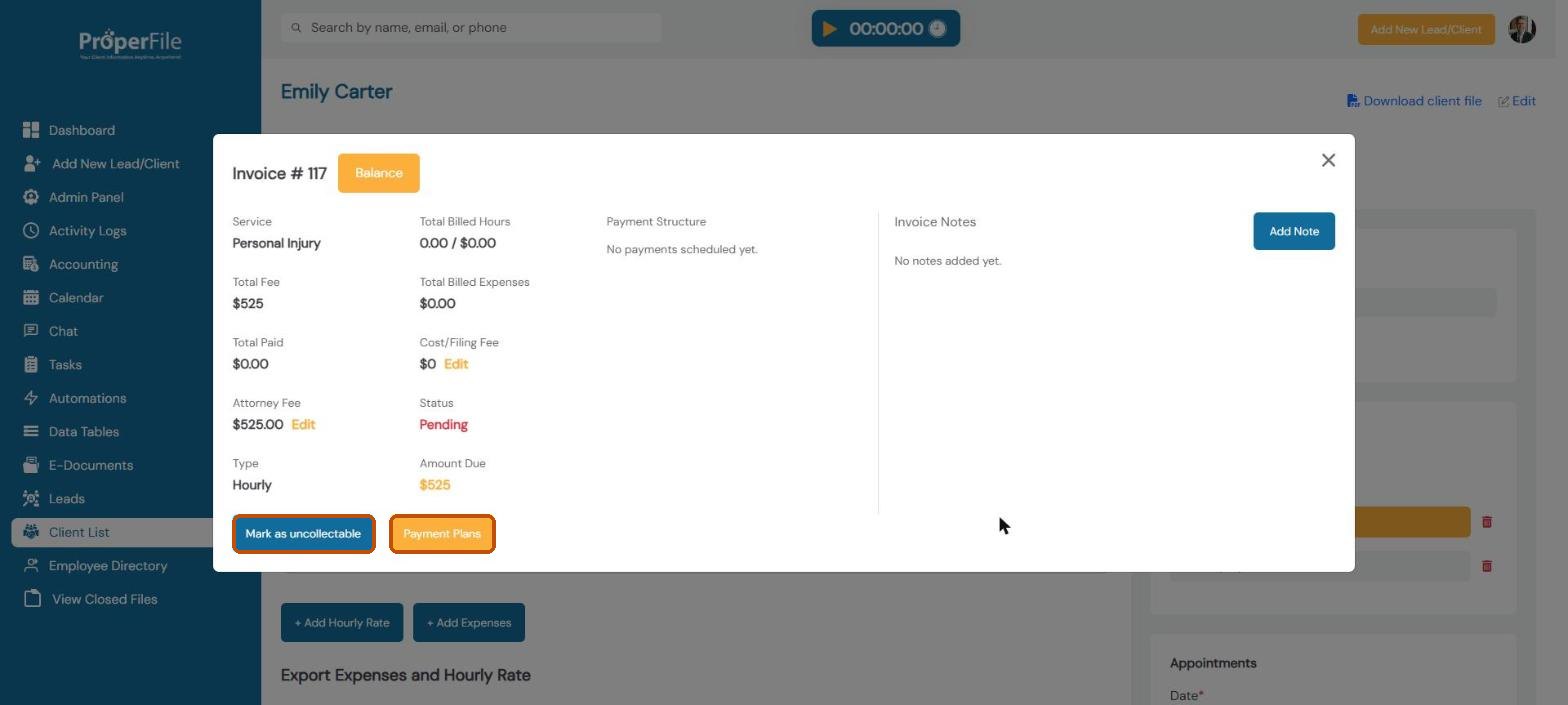
Click Payment Plans
In the invoice details, click Payment Plans. (If the client will never pay, use Mark as uncollectable instead.)
Step 3
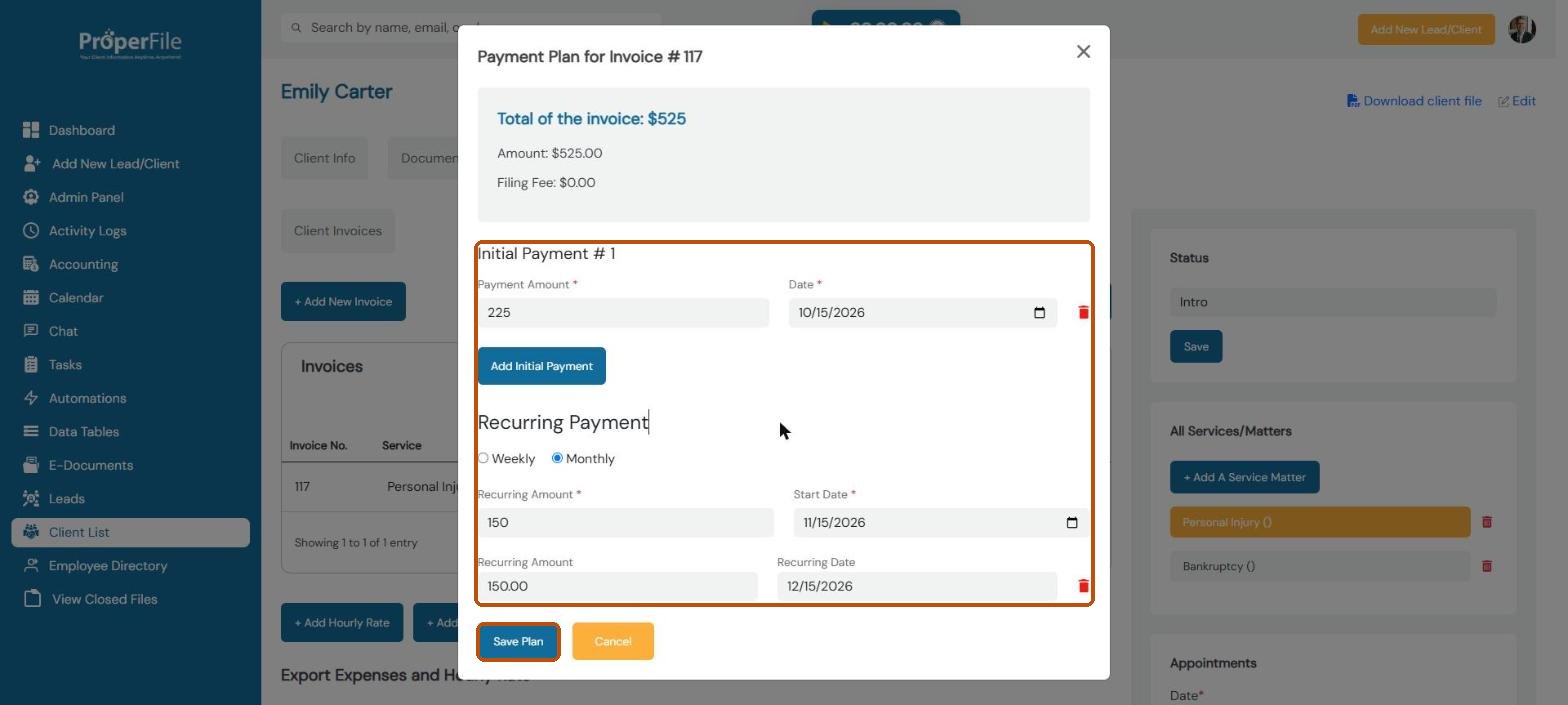
Set up the payments
Enter the first payment’s amount and date. Click Add Initial Payment for more up-front payments. For the rest, choose Weekly or Monthly, enter the recurring amount and the start date, and ProperFile lists every payment until the invoice is paid off. Click Save Plan.
Tip: for a single payment in full, enter the whole amount as the first payment and don’t choose a recurring option. Recurring amounts must be whole dollars.
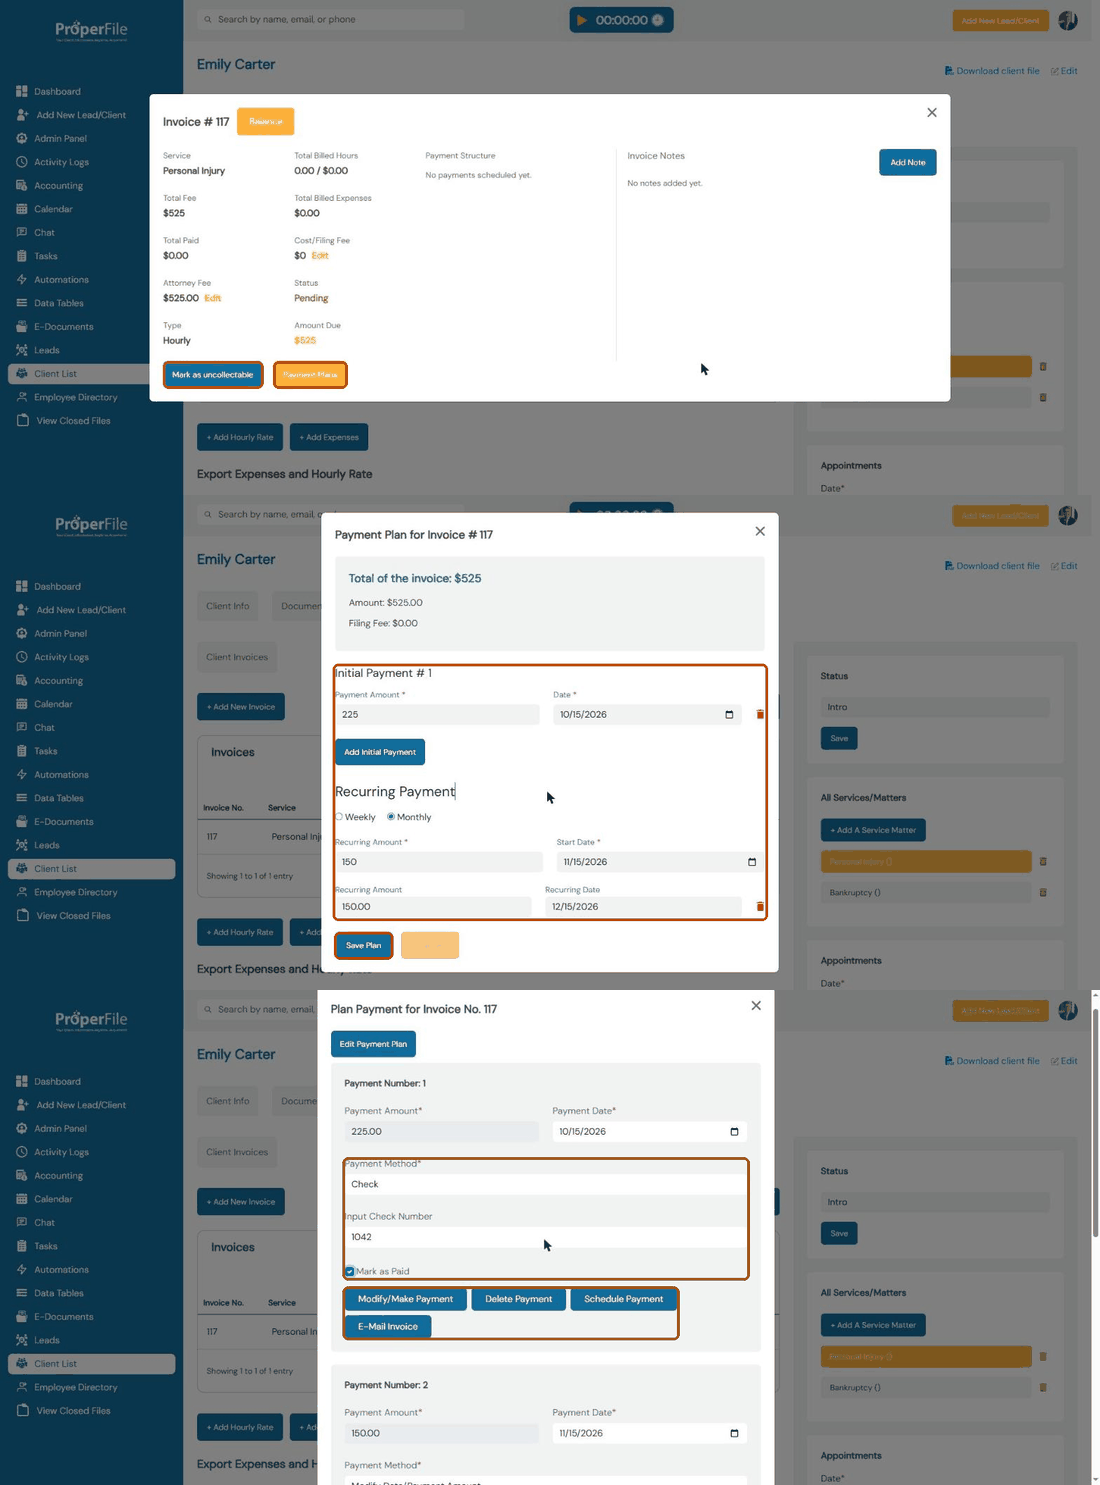
Watch it: setting up a payment plan
Step 4
Record or take each payment
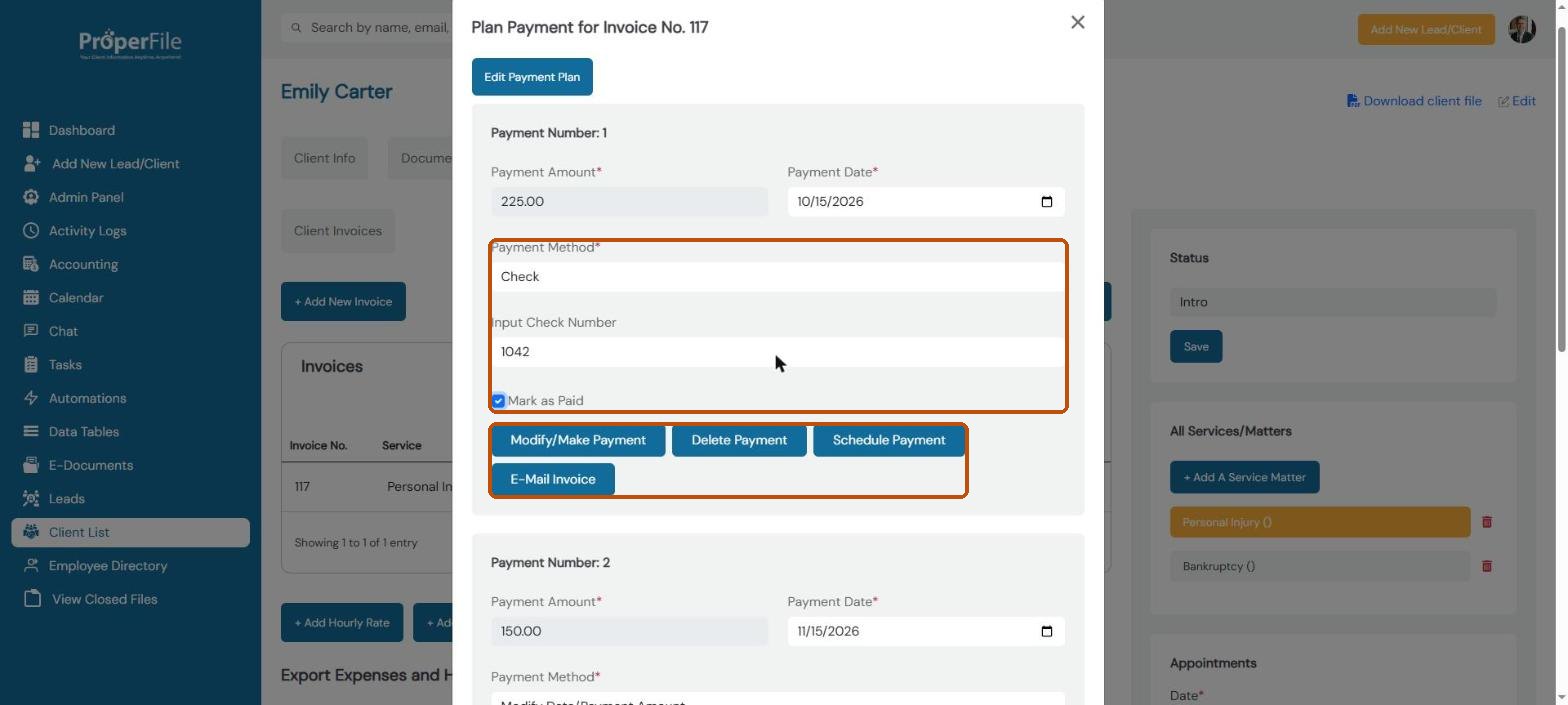
Each payment in the plan has its own box. When the client pays:
Cash or check: choose the payment method, type the check number if there is one, tick Mark as Paid and click Modify/Make Payment.
Credit or debit card: choose Credit/Debit Card to charge the card through LawPay, or click Schedule Payment to charge it automatically on the due date.
To change a payment’s date or amount, choose Modify Date/Payment Amount. E-Mail Invoice sends the client the invoice for that payment.
Step 5
See who owes what
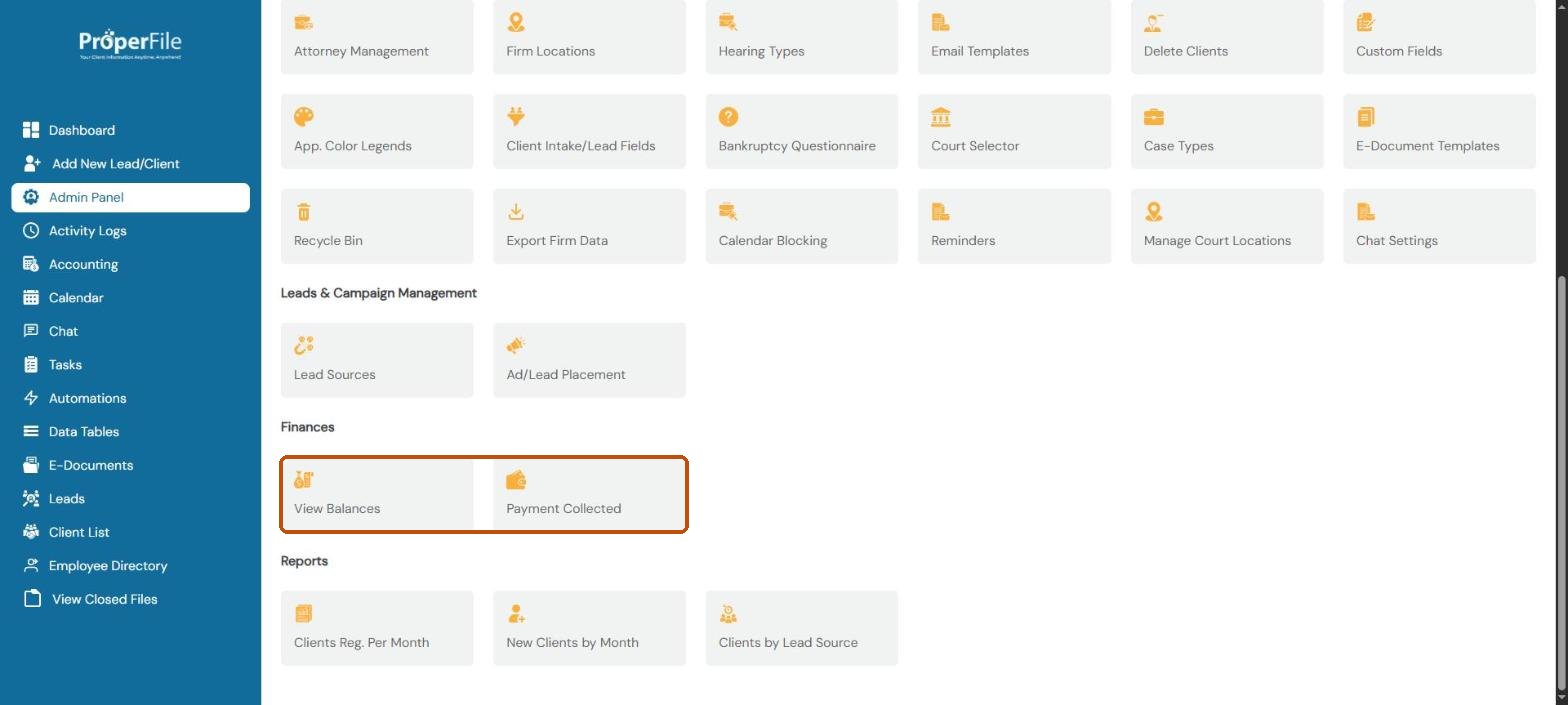
In the Admin Panel, under Finances, View Balances lists what each client still owes and Payment Collected shows what’s come in.
What’s next
Keep going
Next, let ProperFile handle routine follow-ups with Automations. All guides are in the Help Center.