Give each person at your firm their own login, then choose what they’re allowed to do, such as adding clients, taking payments or opening the Admin Panel.
Time needed: about 5 minutes per user.
Before you start: adding a user may change your bill. During your free access period, new users are free. After that, each new user adds a prorated charge to the card on file for your subscription.
Step 1
Open User Management
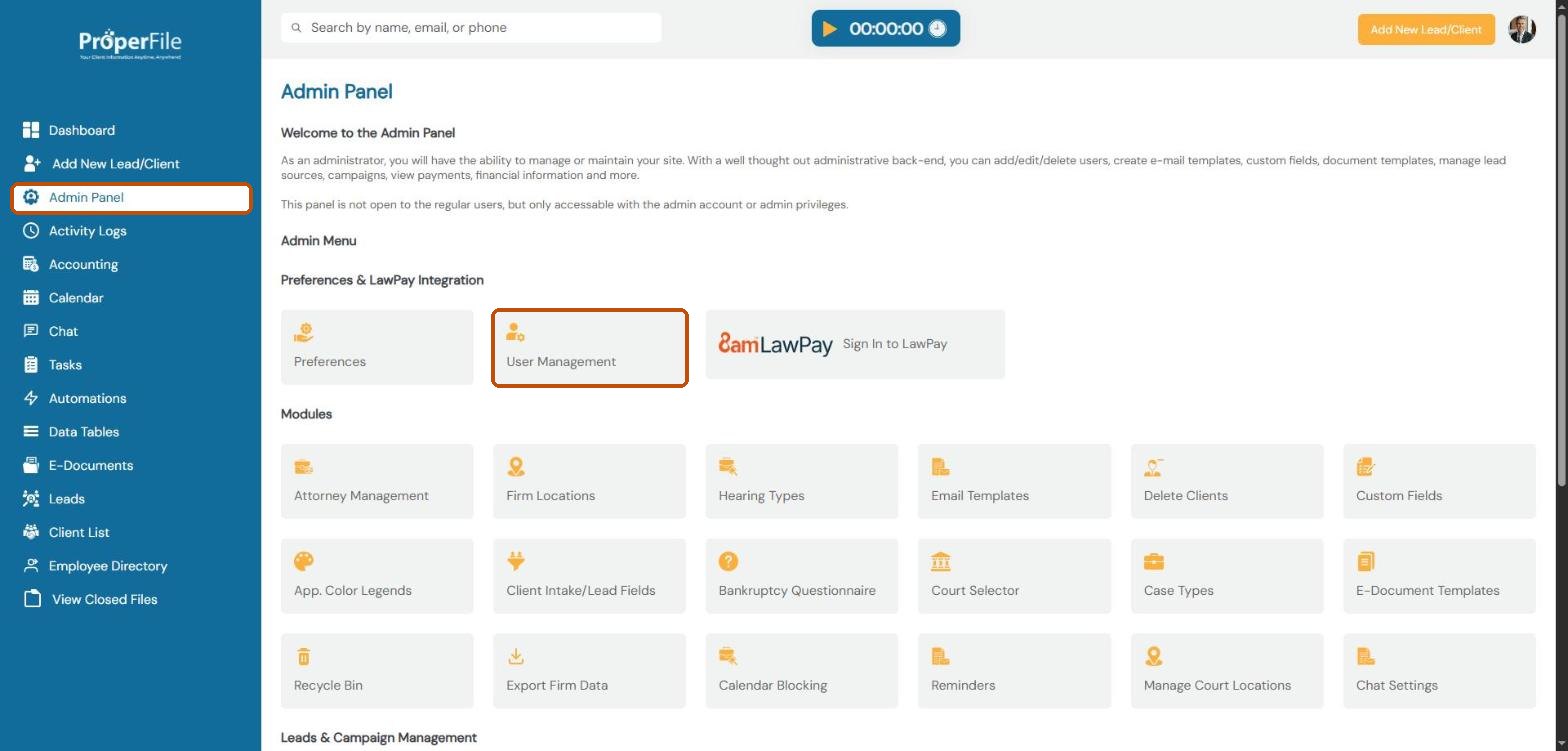
Click Admin Panel in the left menu, then click User Management.
Step 2
Click Add New User
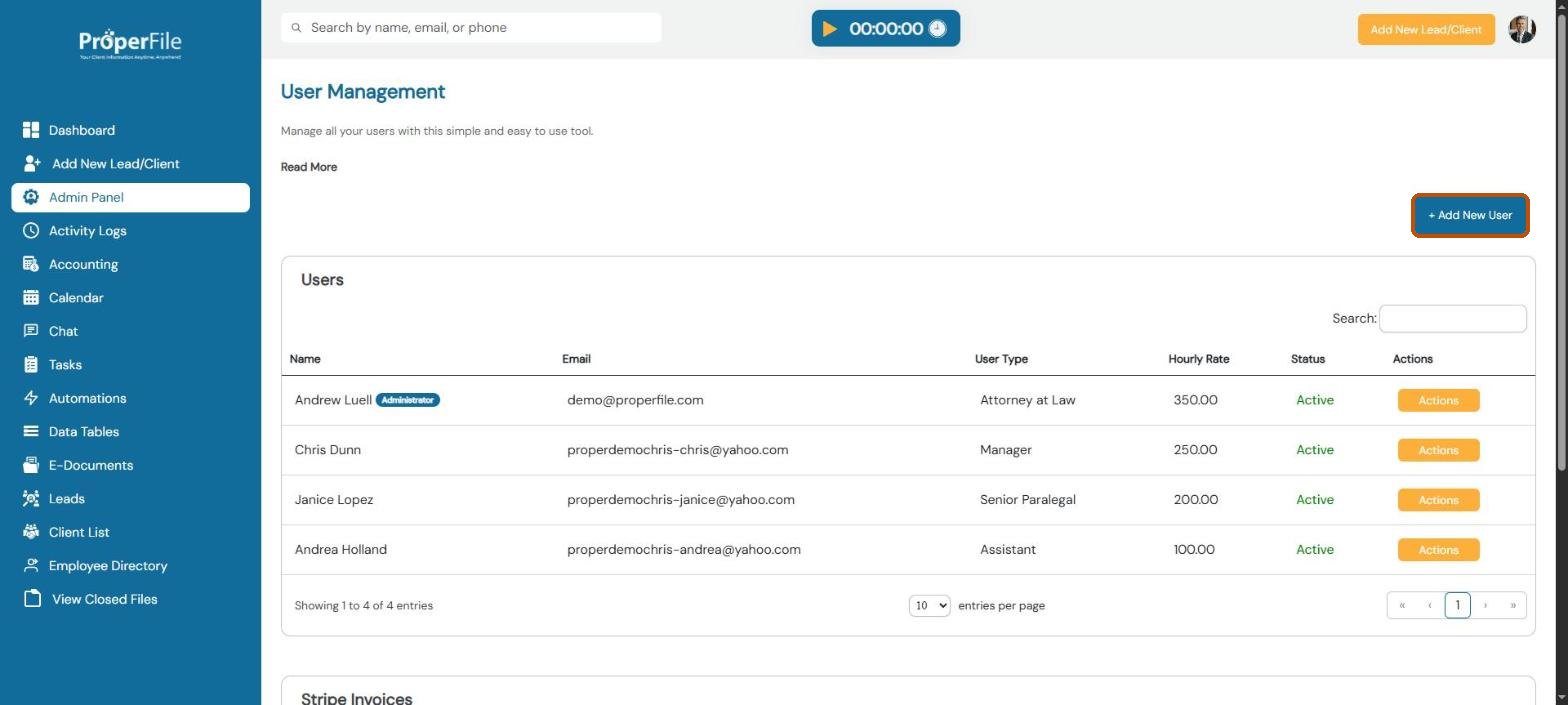
You’ll see everyone who has a login, with their email, user type, hourly rate and status. Click + Add New User.
Step 3
Fill in their details and click Add User
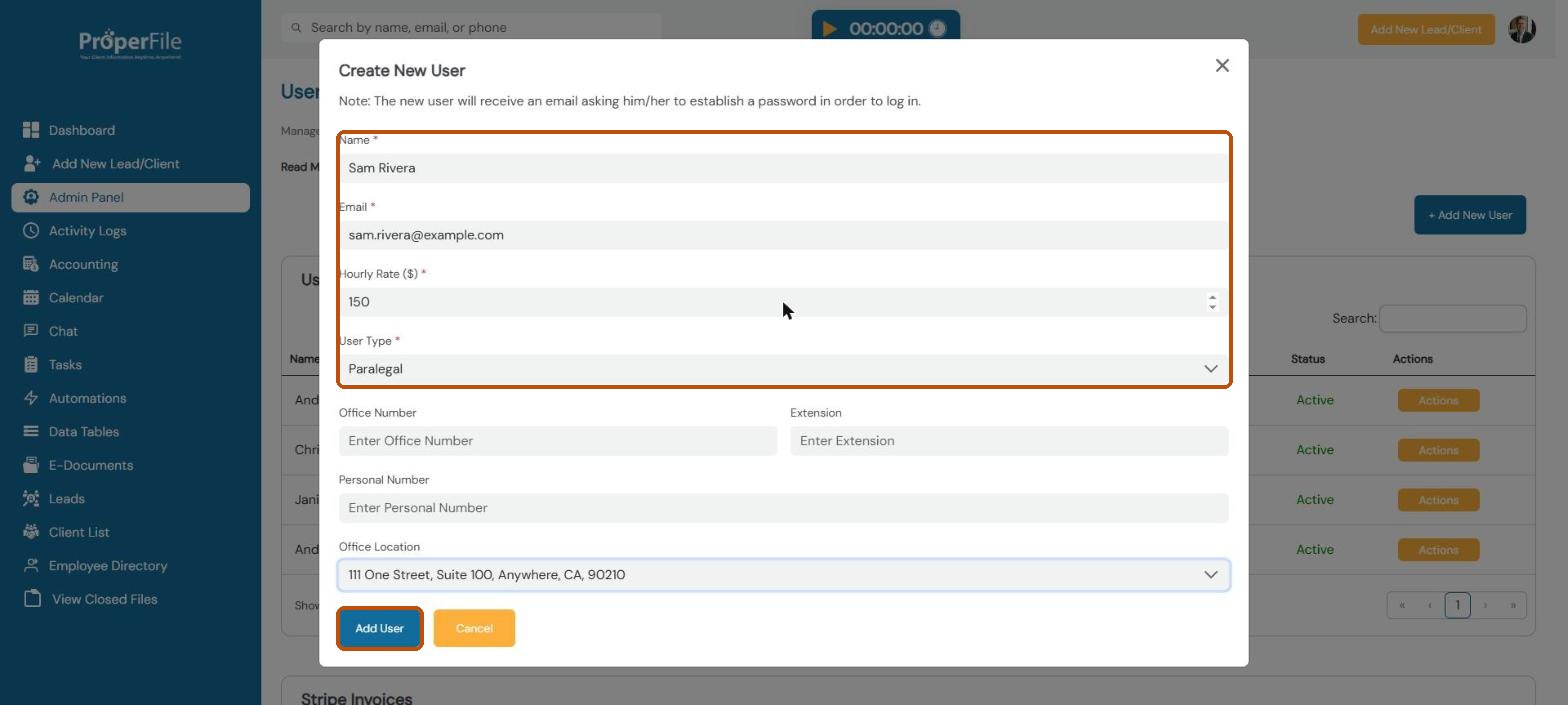
Enter the person’s Name, Email, Hourly Rate and User Type (Attorney at Law, Paralegal, Assistant and so on). Office number, extension, personal number and office location are optional. Click Add User.
Tip: the new user gets an email asking them to set a password, so double-check the email address. The hourly rate is used for their time entries.
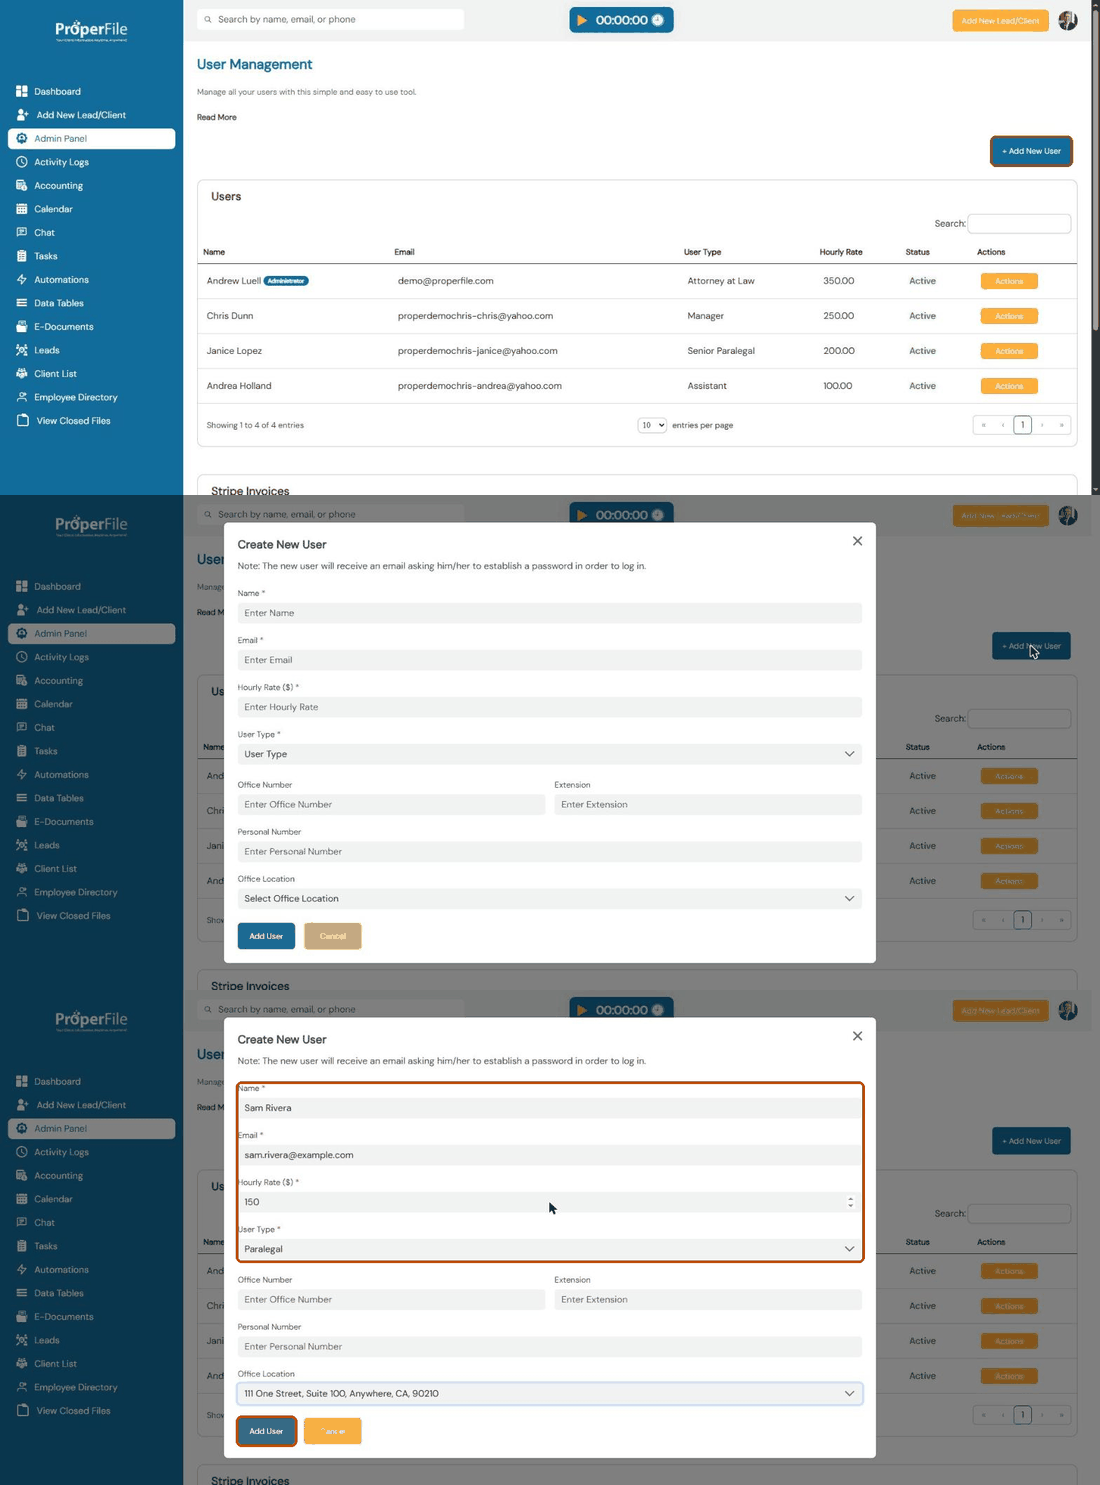
Watch it: adding a new user
Step 4
Open their permissions
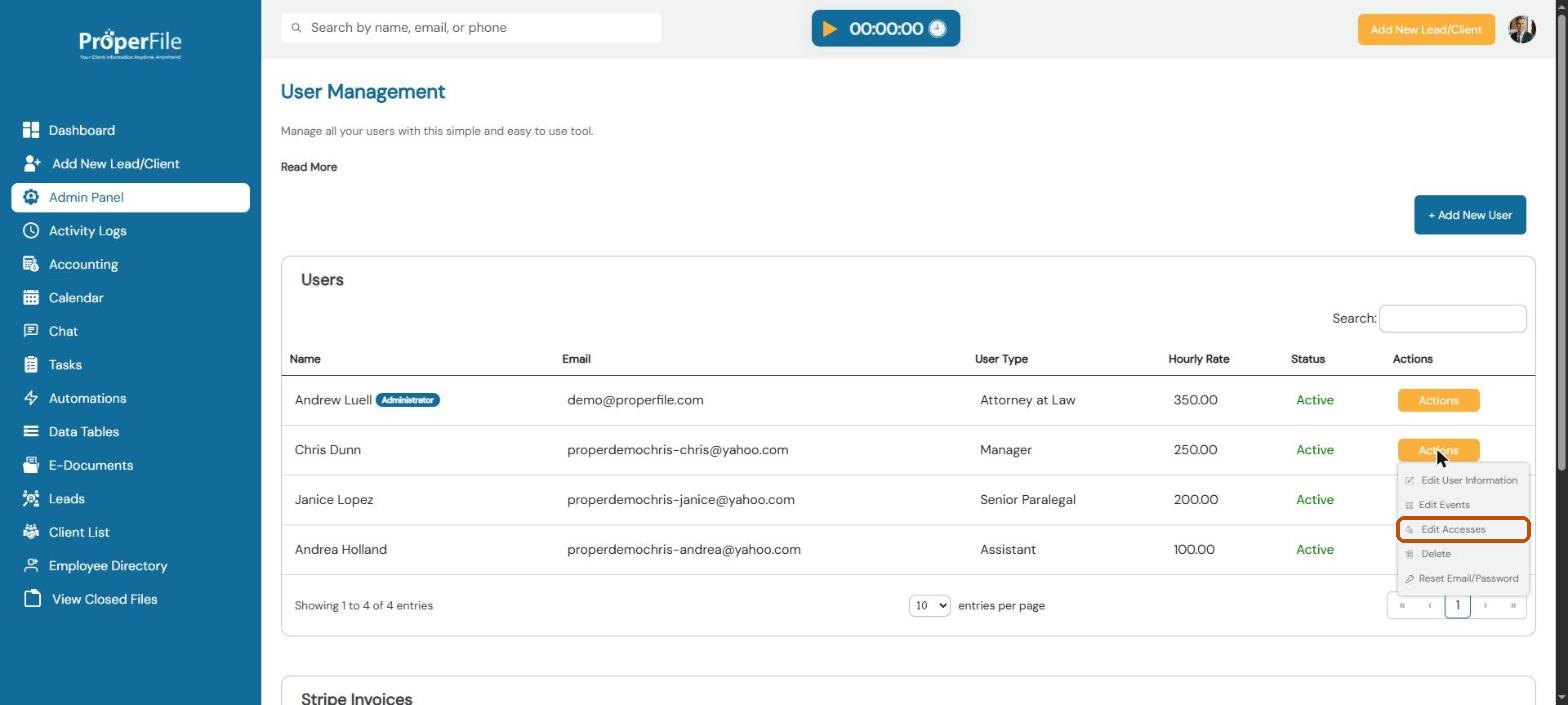
In the user list, click the orange Actions button next to the person, then click Edit Accesses.
Step 5
Choose what they can do and apply
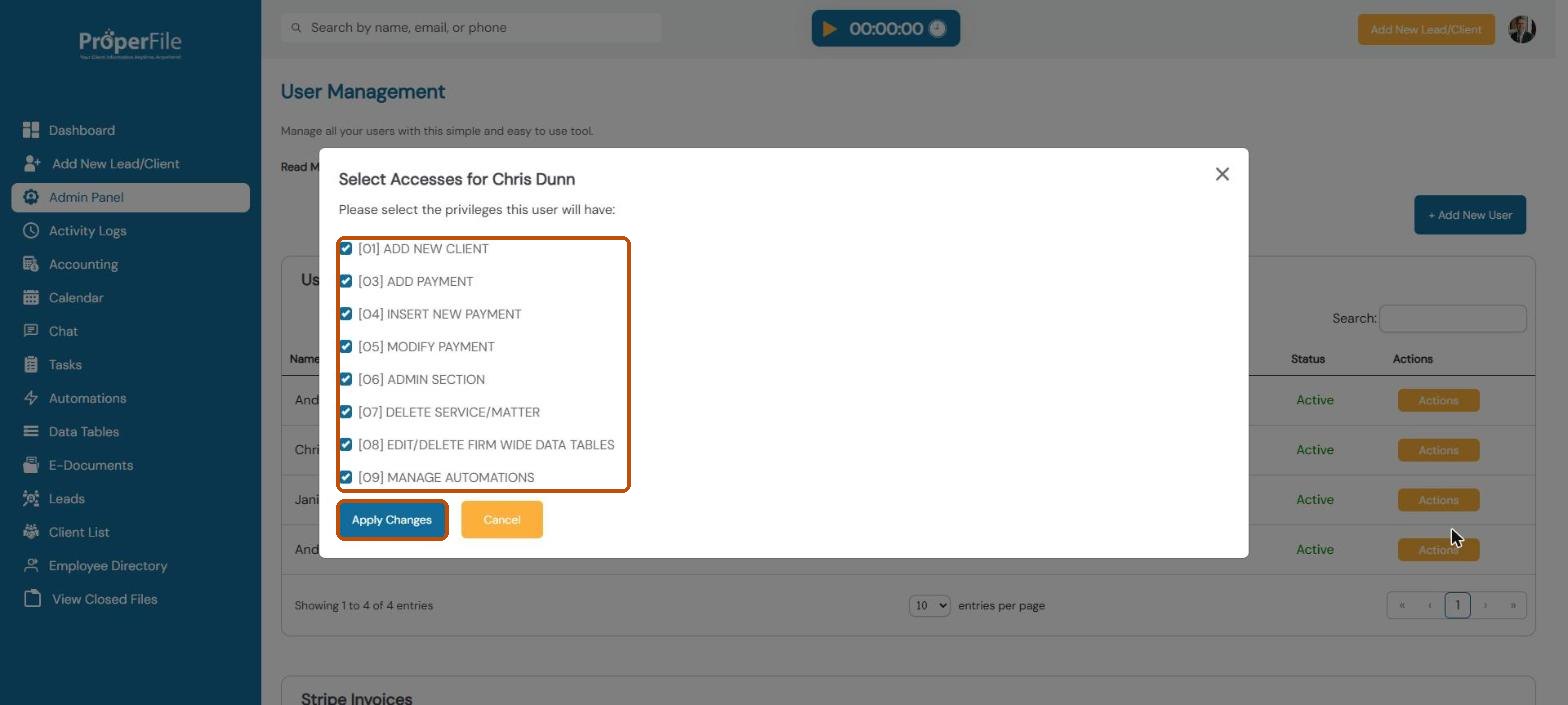
Tick each thing this person is allowed to do, untick the rest, and click Apply Changes:
Add new client: add leads and clients
Add payment, Insert new payment and Modify payment: record and change payments
Admin section: open the Admin Panel
Delete service/matter: remove a matter from a client
Edit/delete firm-wide data tables: change shared data tables
Manage automations: create and change automations
Tip: only give Admin section to people who should change your firm’s settings, because the Admin Panel controls everything in these guides.
Step 6
Edit, reset or remove a user later
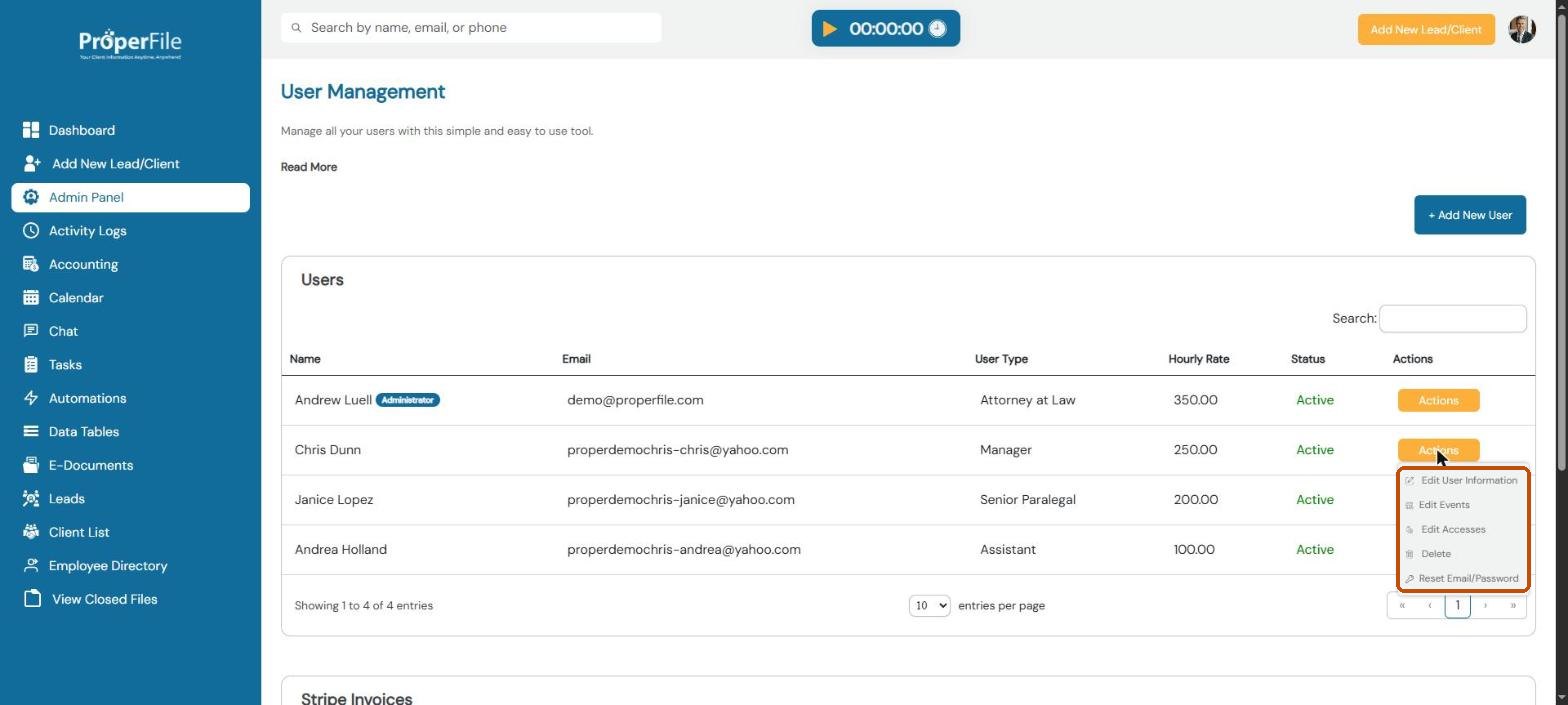
The same Actions menu lets you Edit User Information (name, type, rate, phone, office), Reset Email/Password if someone is locked out, or Delete a user who has left the firm.
What’s next
Keep going
Next, list your attorneys and offices in Attorneys and firm locations. All guides are in the Help Center.