A case type is the kind of matter you handle, such as Bankruptcy, Personal Injury or Divorce. You pick one for every new client, and it decides which custom fields, intake questions and hearing types apply. ProperFile comes with common case types, and you can add your own.
Time needed: about 2 minutes.
Step 1
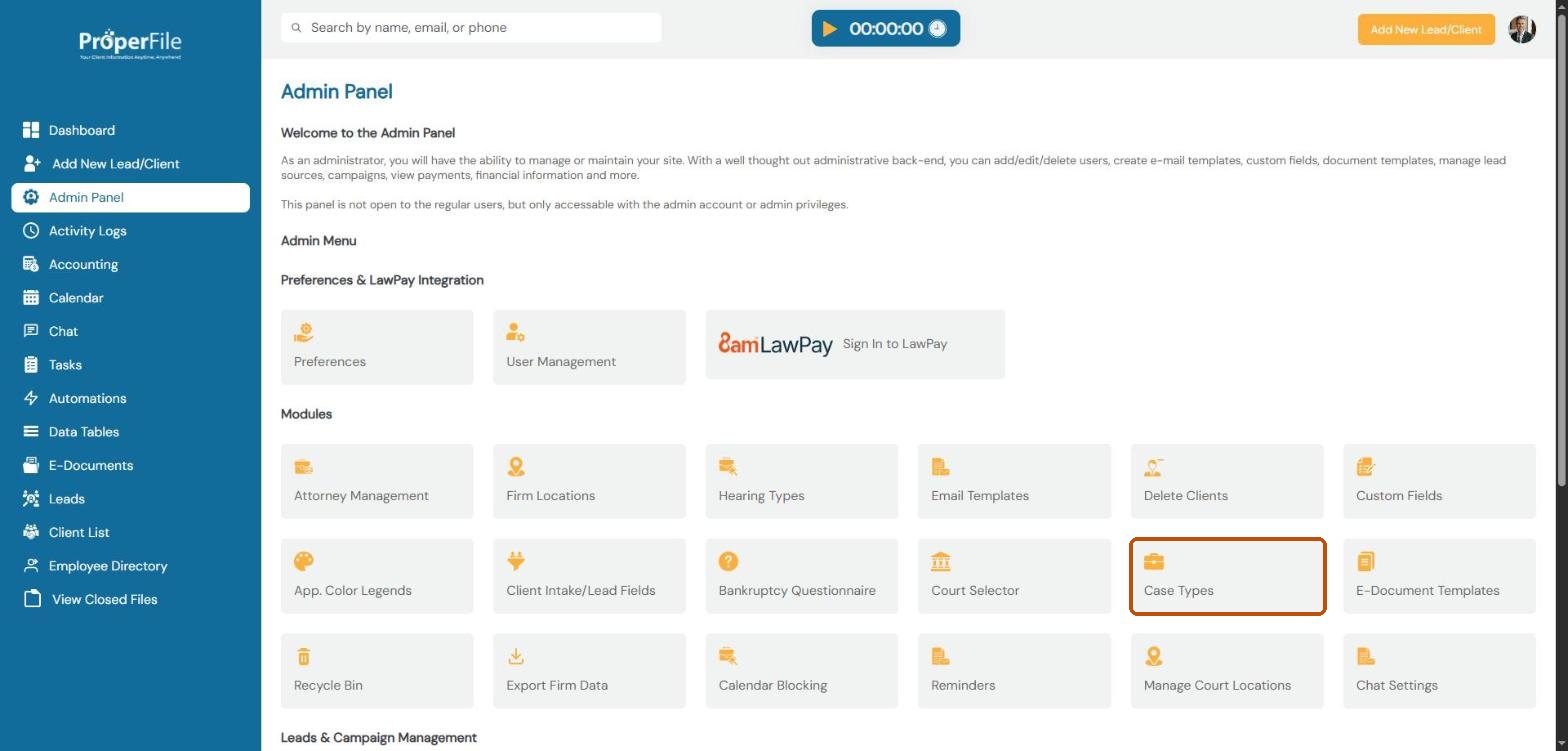
Open Case Types
Click Admin Panel in the left menu, then click Case Types.
Step 2
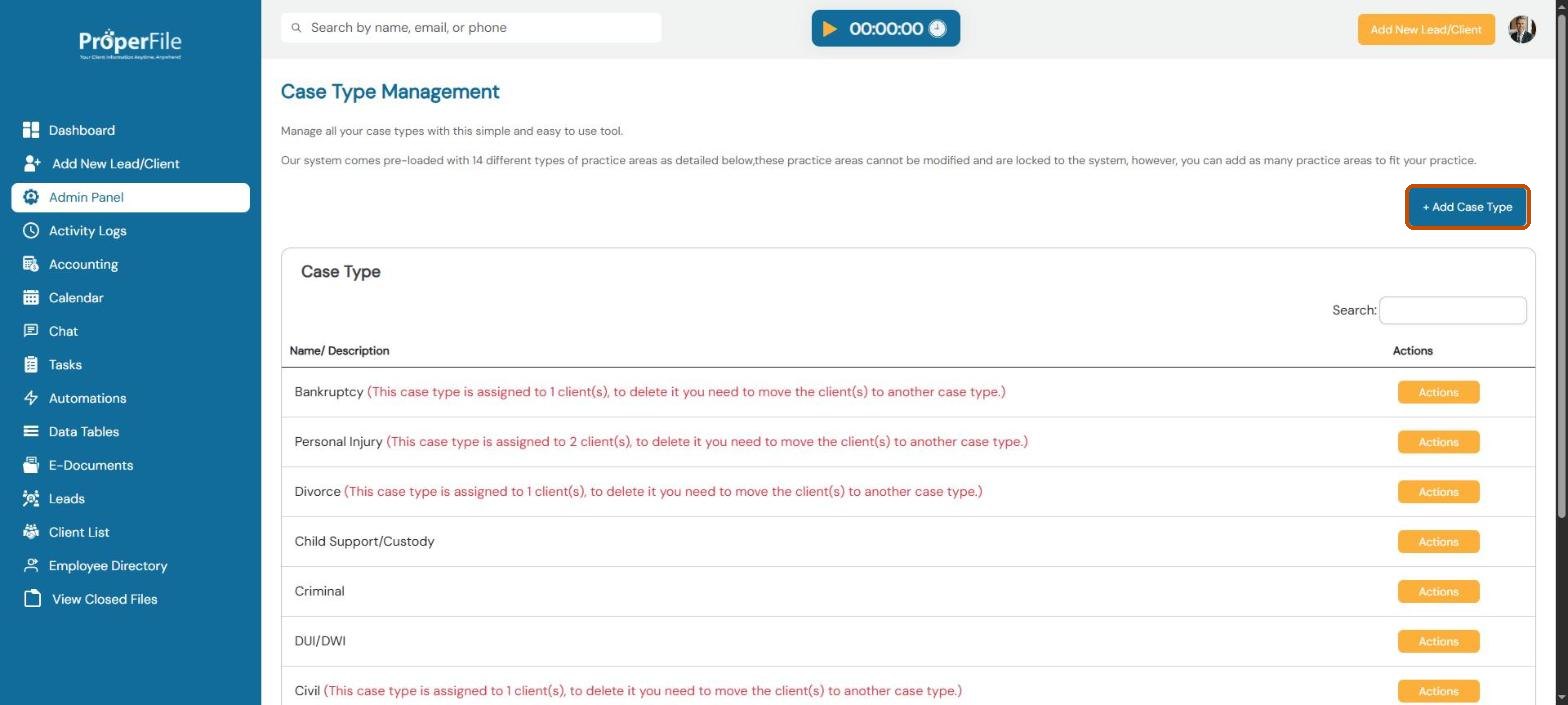
Click Add Case Type
You’ll see the case types ProperFile comes with. These built-in types can’t be renamed, but you can add as many of your own as you need. Click + Add Case Type.
Step 3
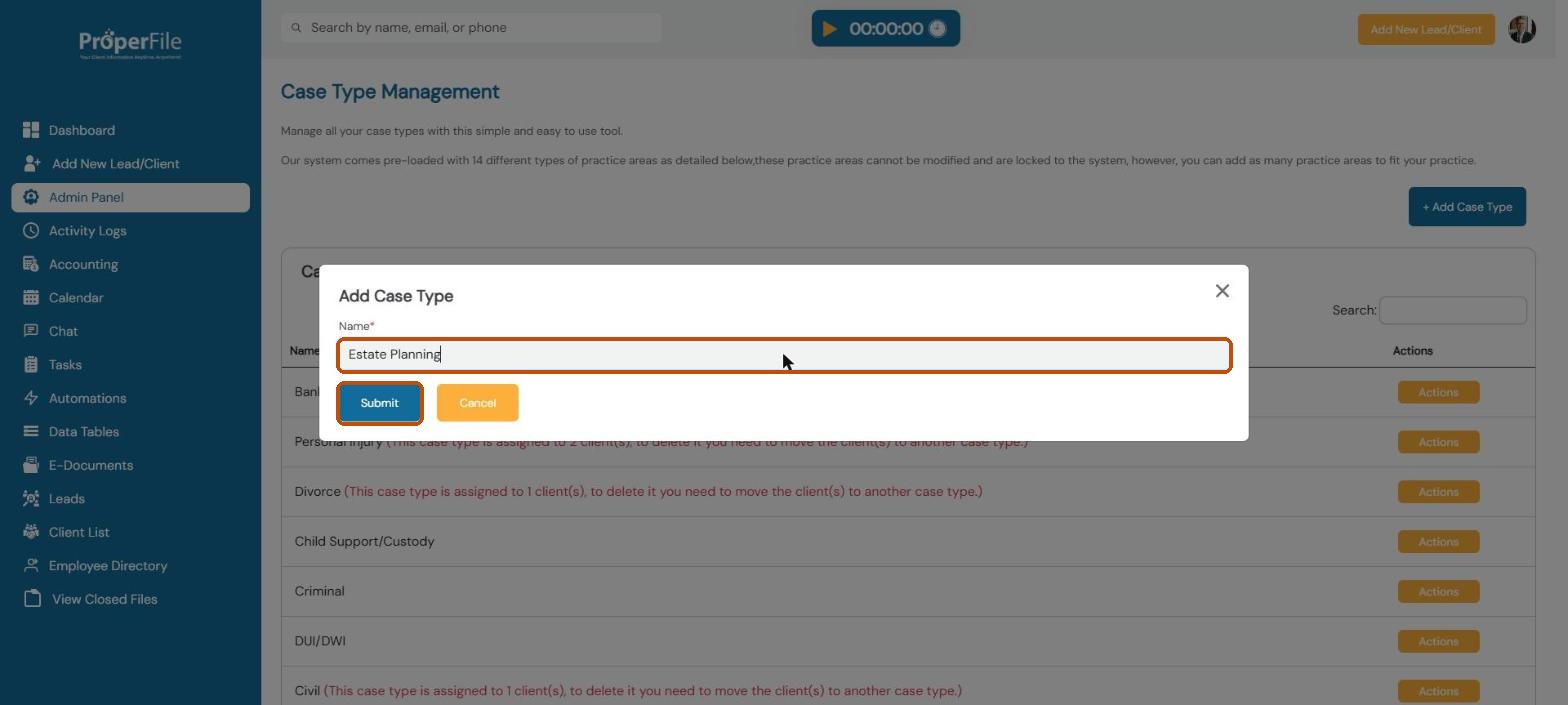
Name it and submit
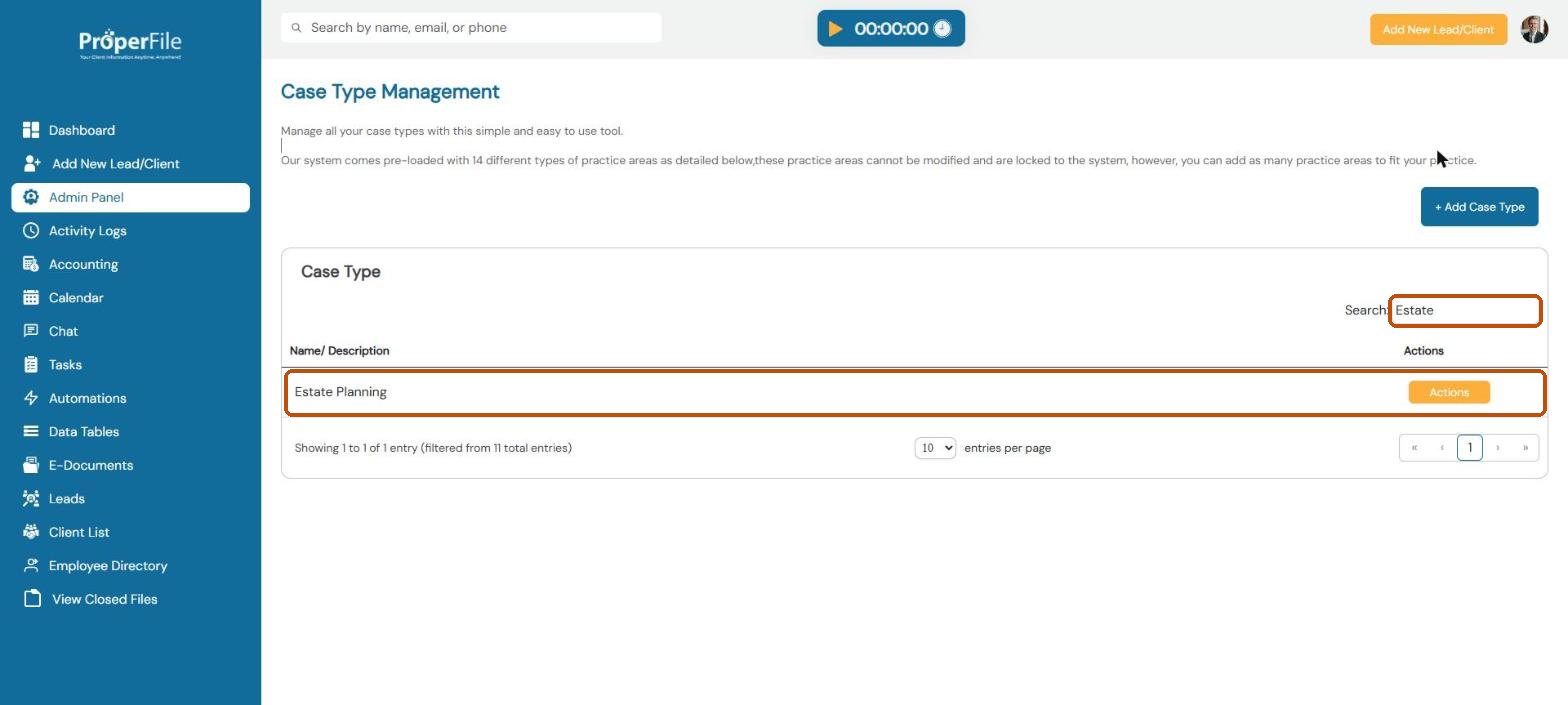
Type the name of the case type, for example Estate Planning, and click Submit.
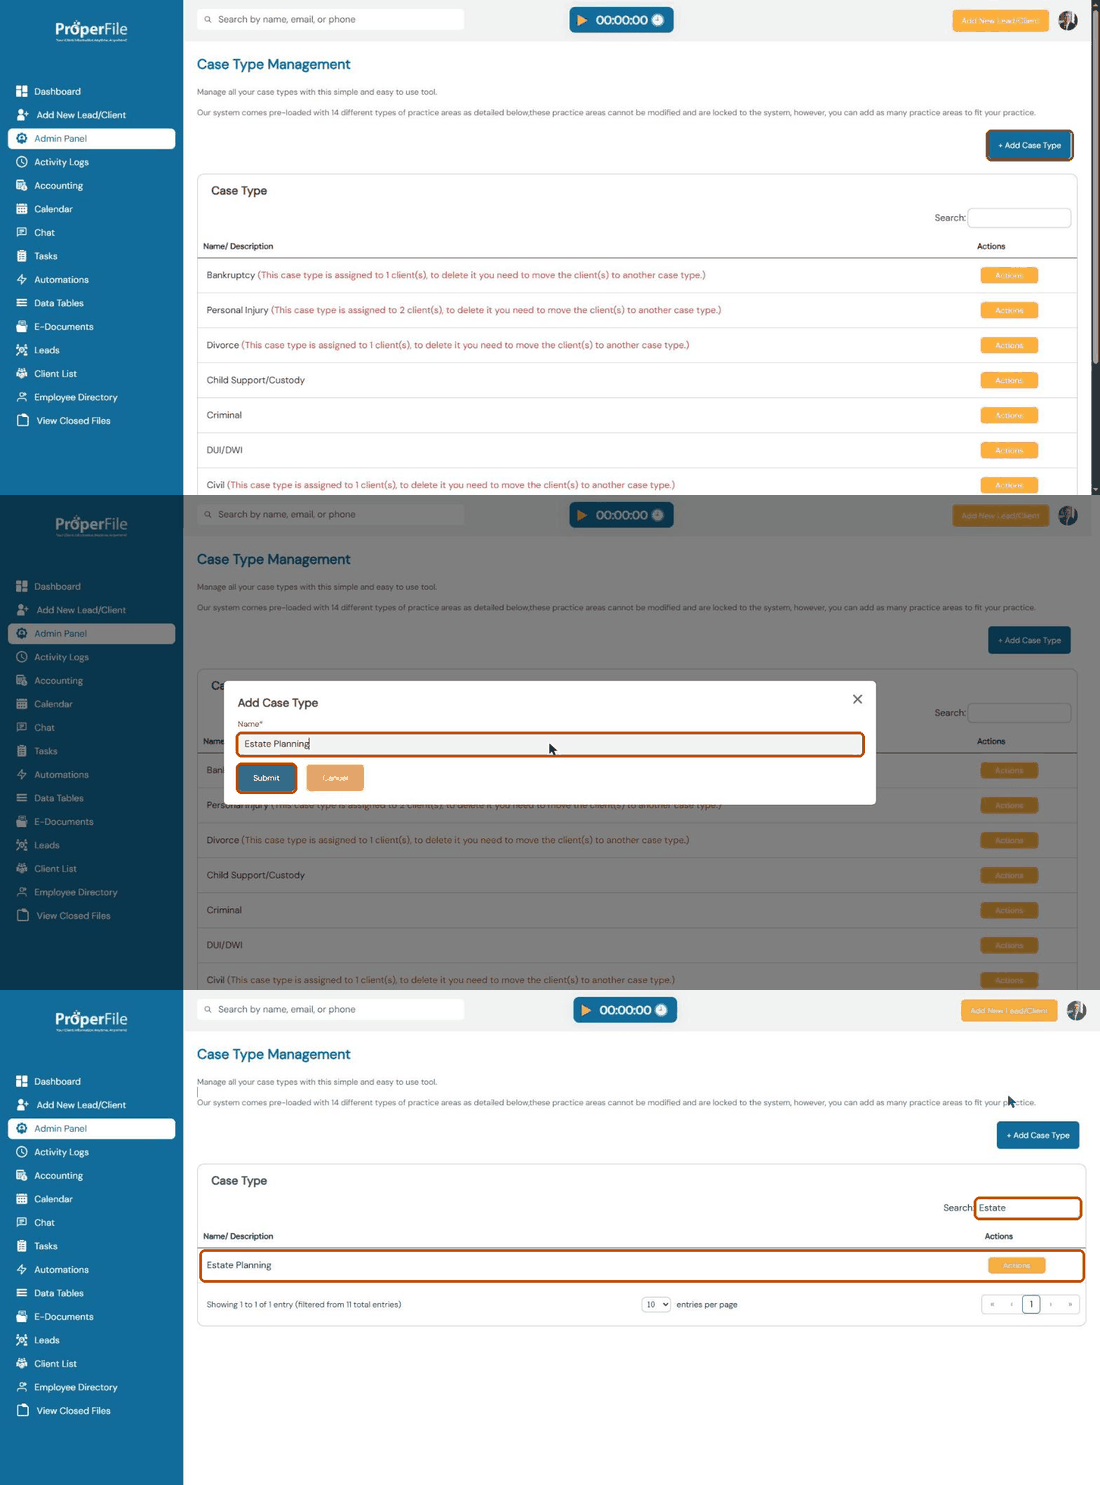
Watch it: adding a case type
Step 4
Find your new case type
The list has more than one page, so the quickest way to find your new case type is to type its name in the Search box. It’s now a choice in the Case Type list when you add a new client.
Step 5
Edit or delete a case type
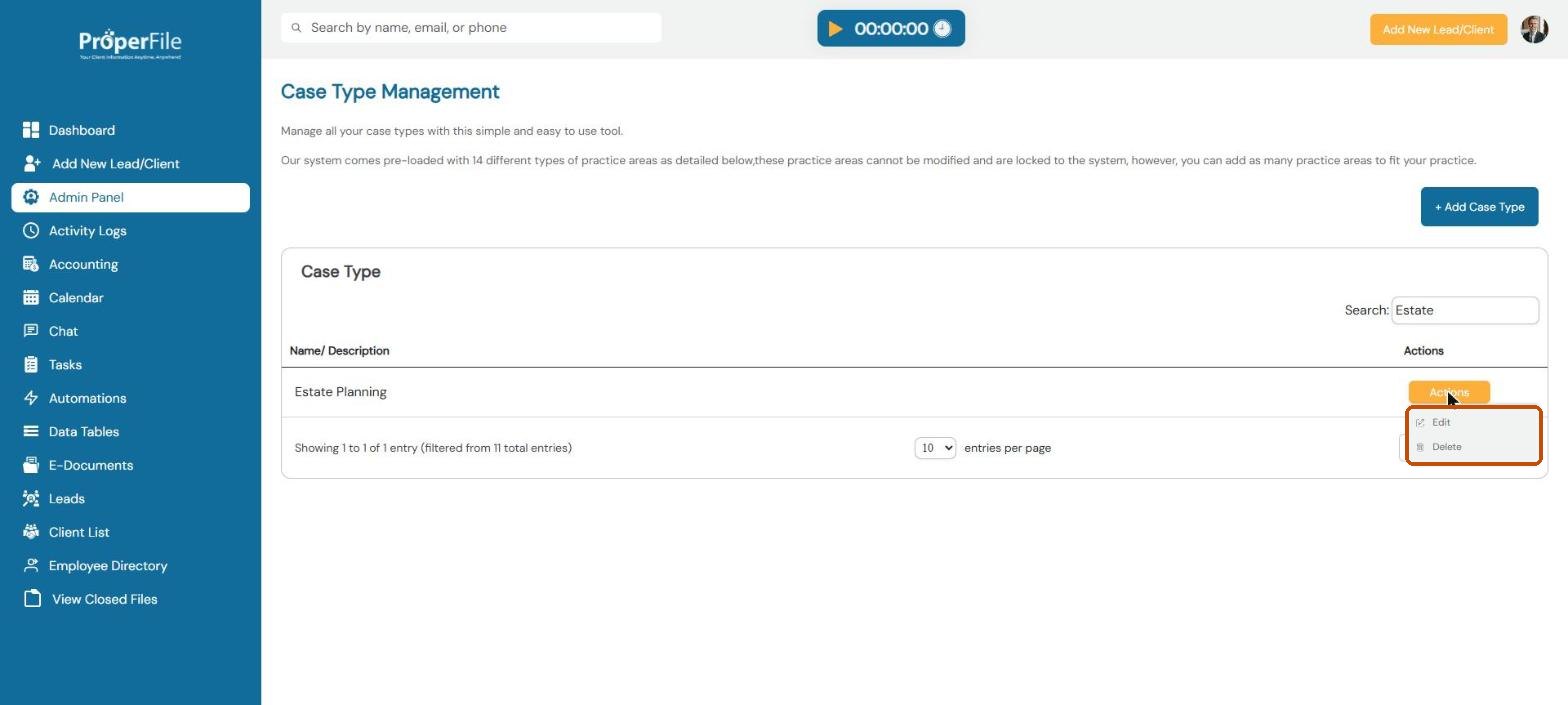
Click Actions next to a case type you added, then Edit to rename it or Delete to remove it.
Tip: you can’t delete a case type while clients are using it. The list shows a red note with how many clients use each one. Move those clients to another case type first.
What’s next
Keep going
Next, collect extra information for each case type with Custom fields. All guides are in the Help Center.