An e-document template is a document you send to clients again and again to sign online, such as a retainer agreement or an engagement letter. You write it once, and ProperFile fills in each client’s details every time you send it.
Time needed: about 10 minutes.
Before you start: templates belong to a case type. If you need a new case type, add it first (see the Case types guide). Your logo and firm details come from the Preferences page (see the Firm information guide).
Step 1
Open E-Document Templates
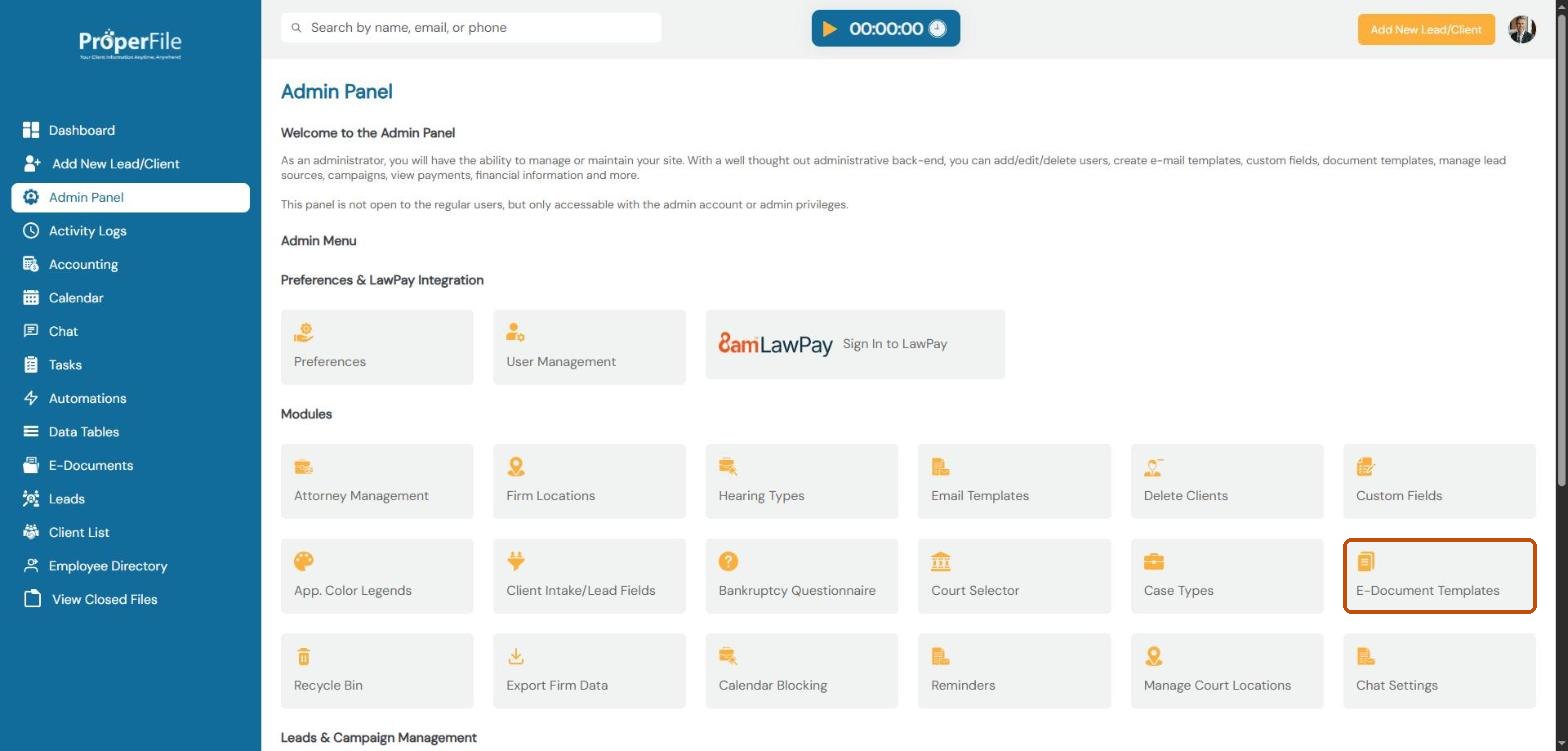
Click Admin Panel in the left menu, then click E-Document Templates.
Step 2
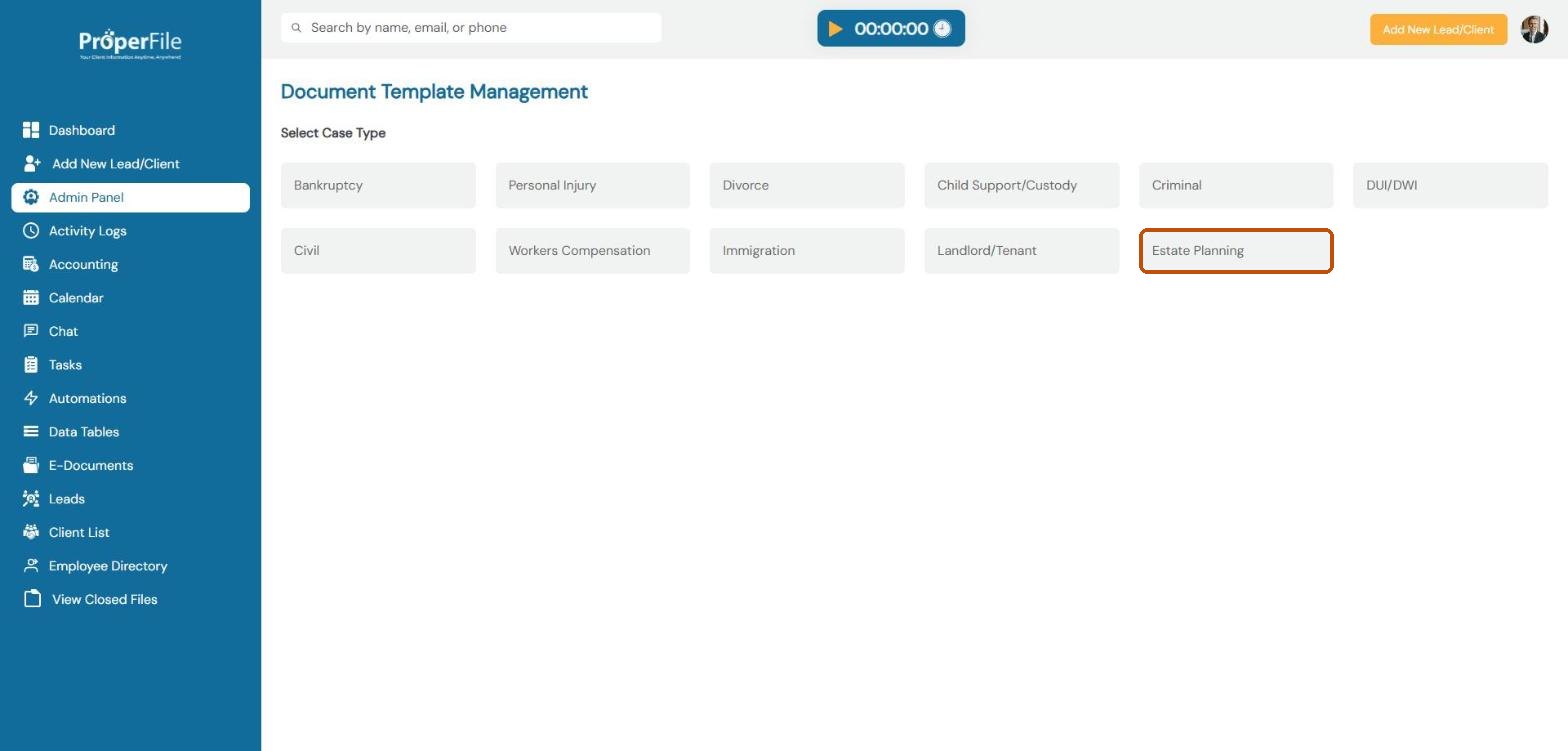
Choose a case type
Click the case type the template is for, for example Estate Planning. When you send a document, ProperFile only lists the templates for that matter’s case type.
Step 3
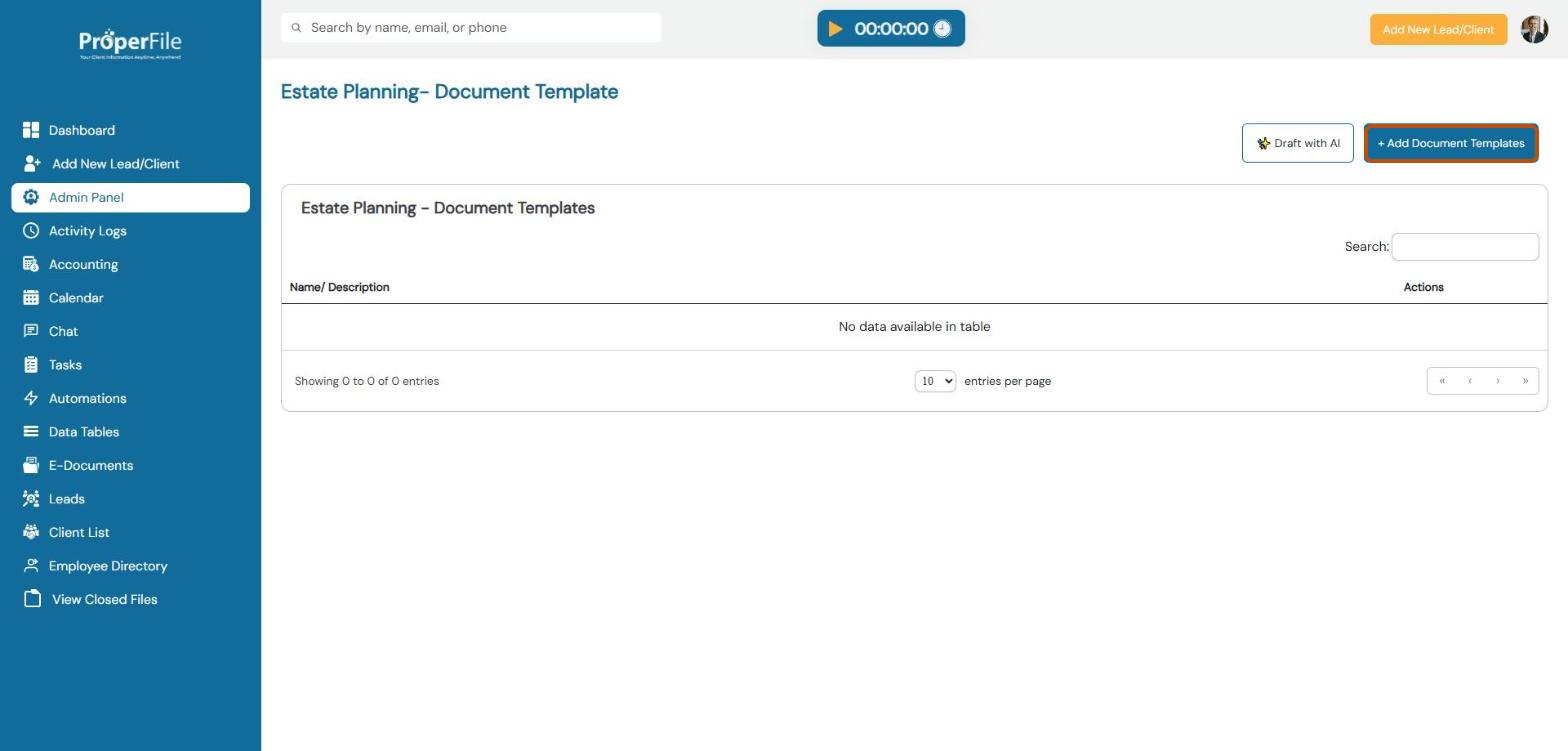
Click Add Document Templates
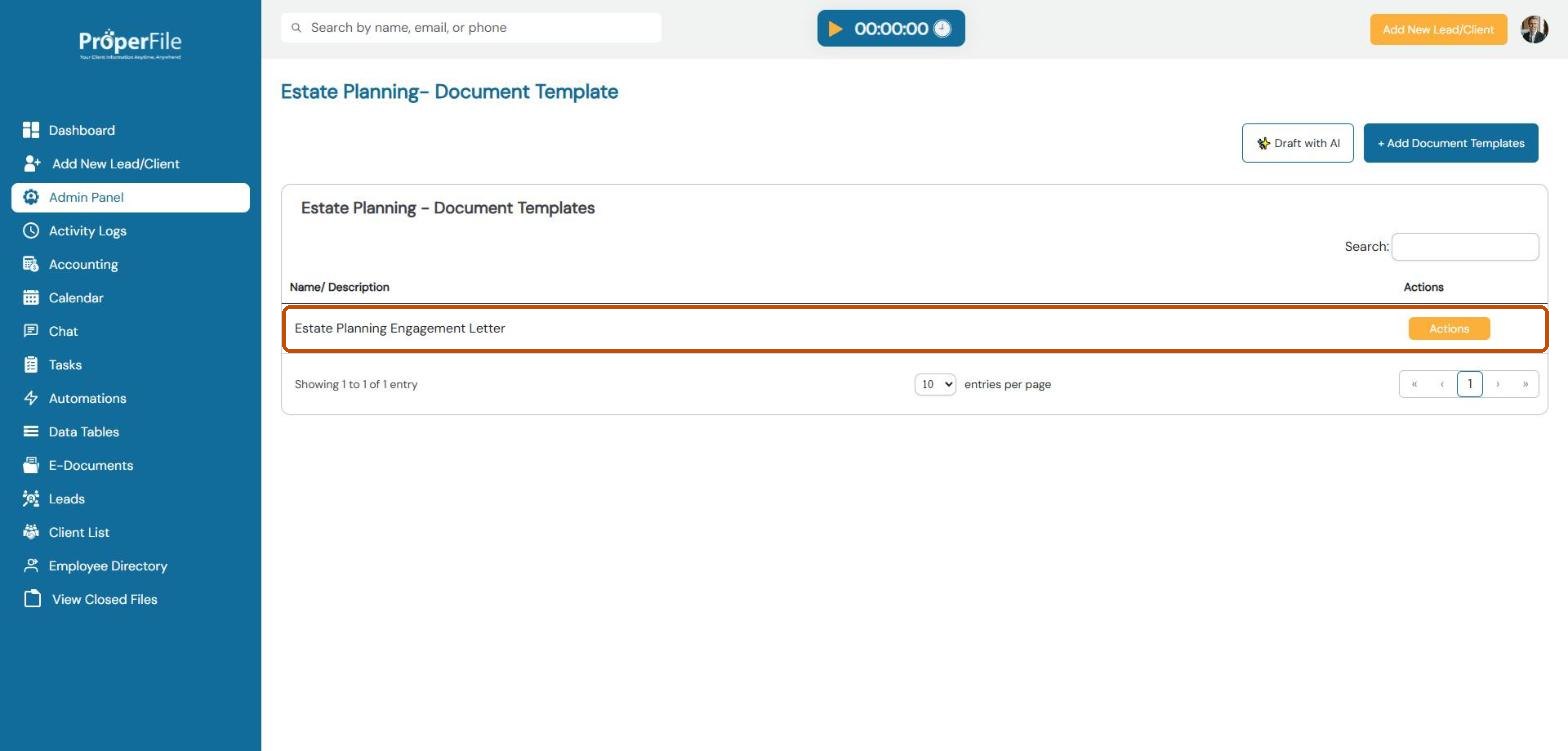
You’ll see the templates you already have for this case type. Click + Add Document Templates.
Watch it: creating a template
Step 4
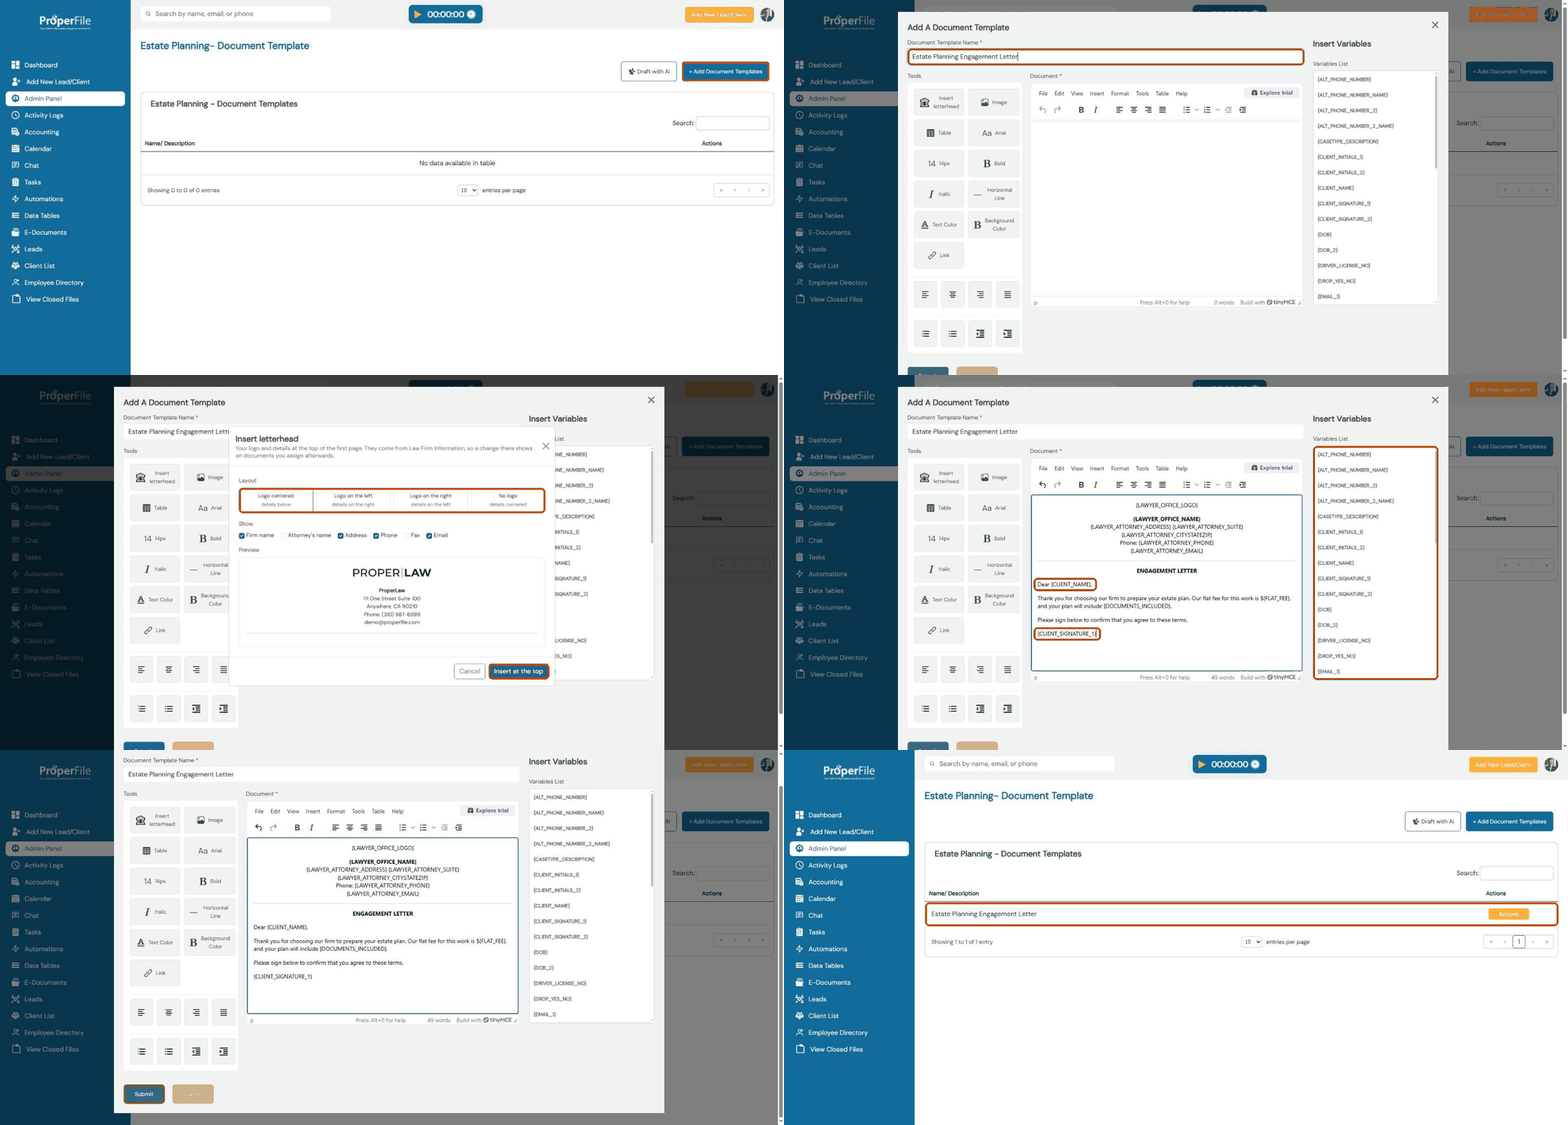
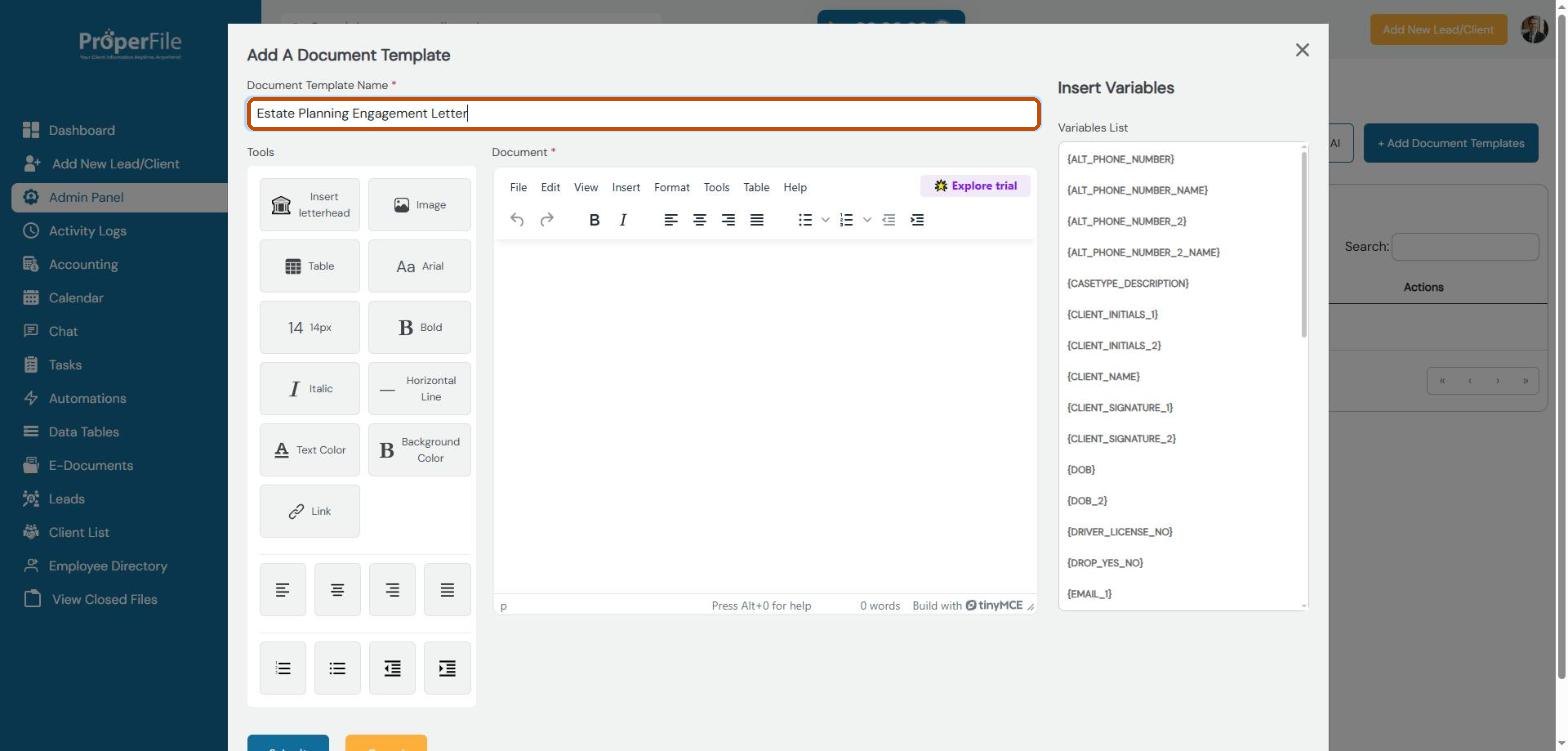
Name the template
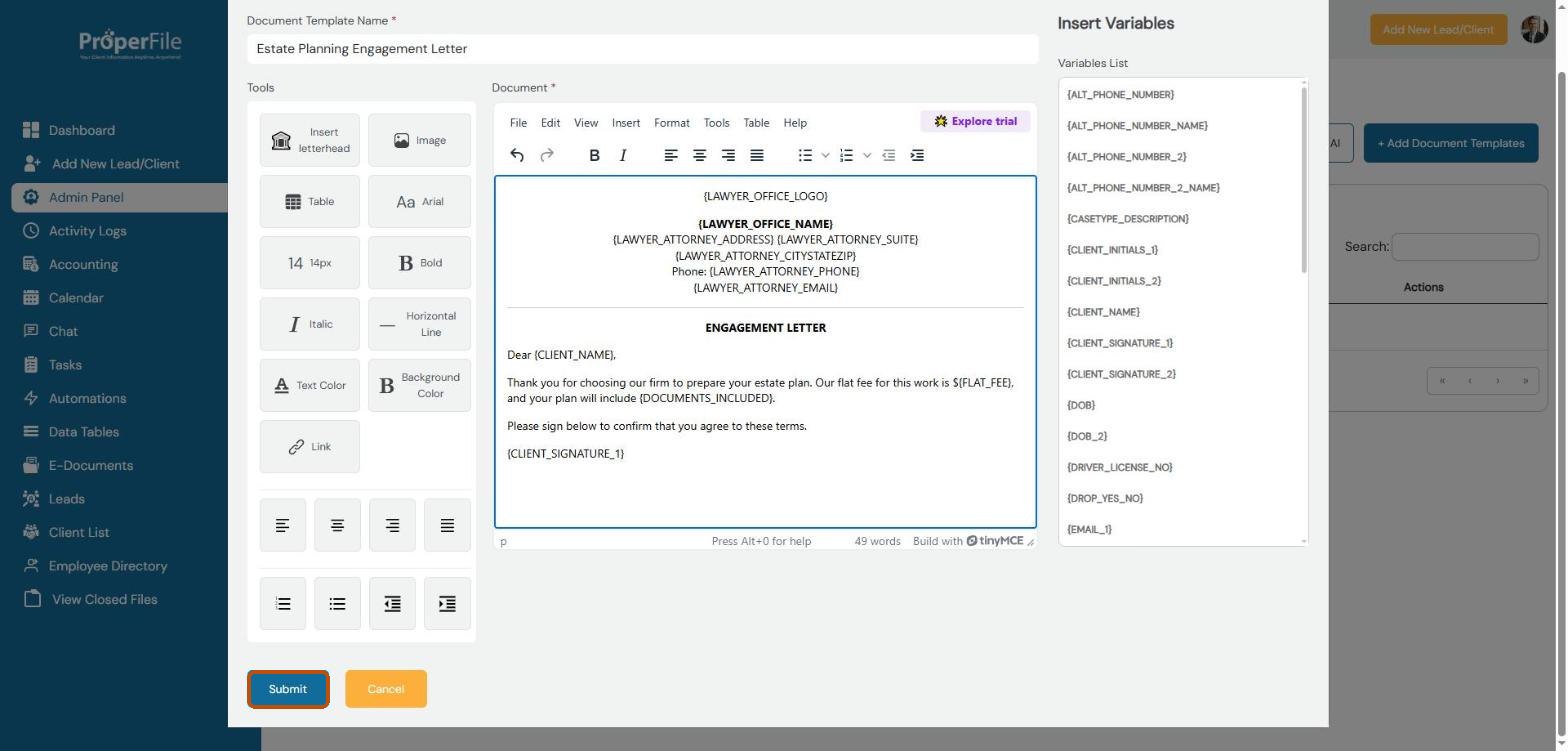
Type a name in Document Template Name, for example Estate Planning Engagement Letter. This is the name you’ll pick from the list when you send it.
Step 5
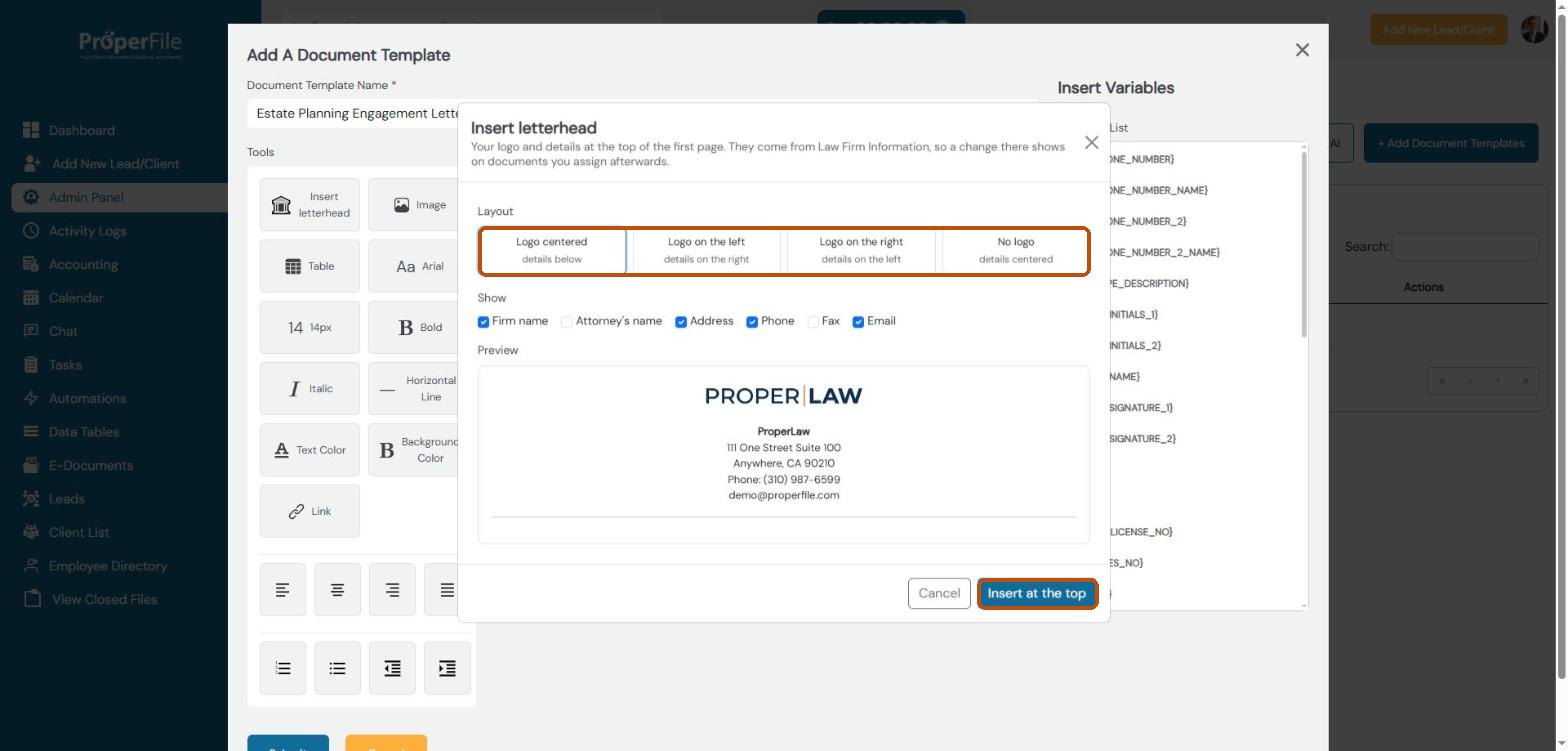
Add your letterhead
Click in the Document box, then click Insert letterhead under Tools. Choose a layout, tick the details you want to show, and click Insert at the top.
Tip: the letterhead uses the logo and details on your Preferences page, so if you change them there, documents you send afterwards show the new details.
Step 6
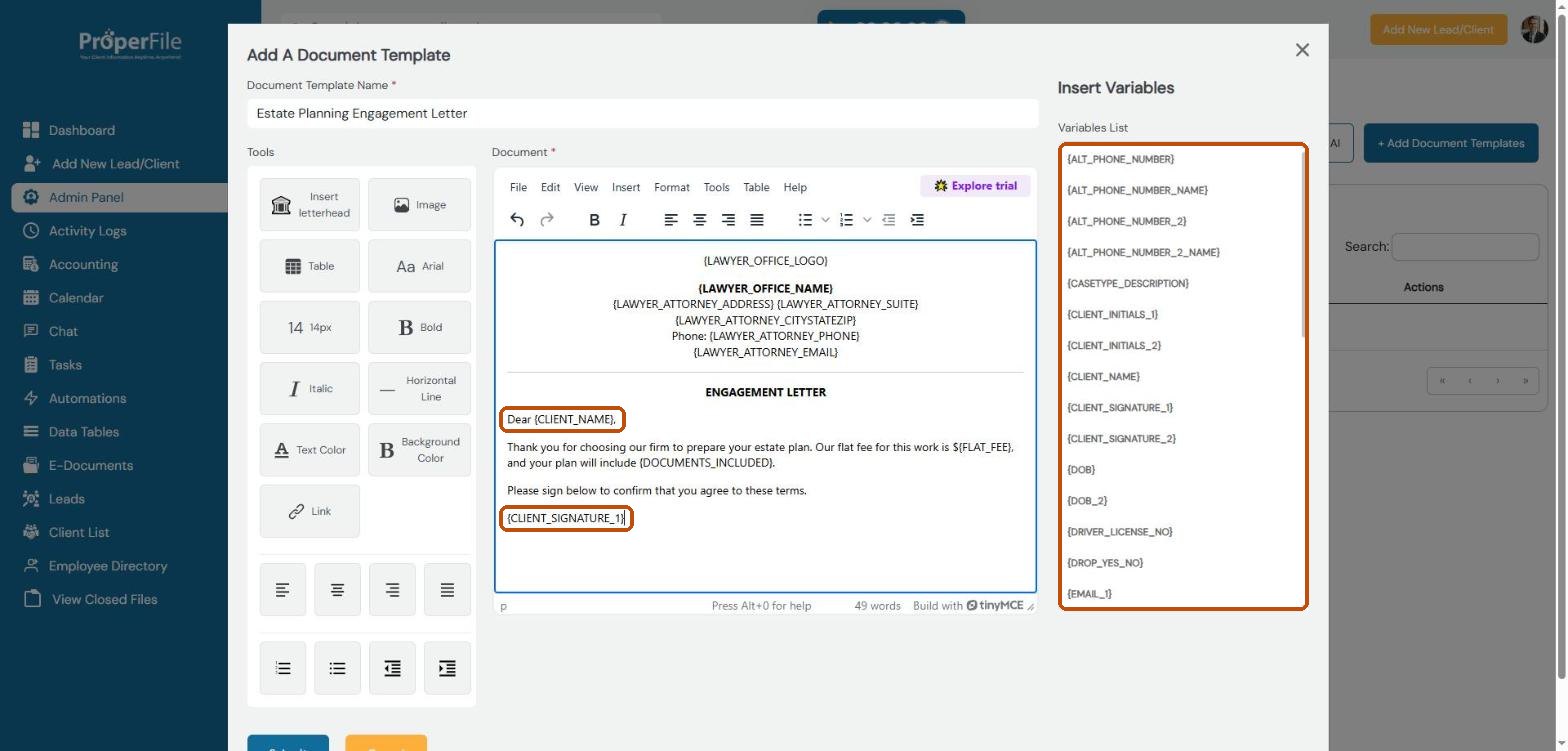
Write the document and insert variables
Type or paste your document into the Document box. Where you want the client’s details, click a variable in the Variables List on the right, such as {CLIENT_NAME}. It goes in where your cursor is, and ProperFile replaces it with that client’s details when you send the document.
Put {CLIENT_SIGNATURE_1} where the client signs. If a second person signs, such as a spouse, add {CLIENT_SIGNATURE_2} too. Use the Tools on the left for bold, font size, alignment, lists and tables.
Step 7
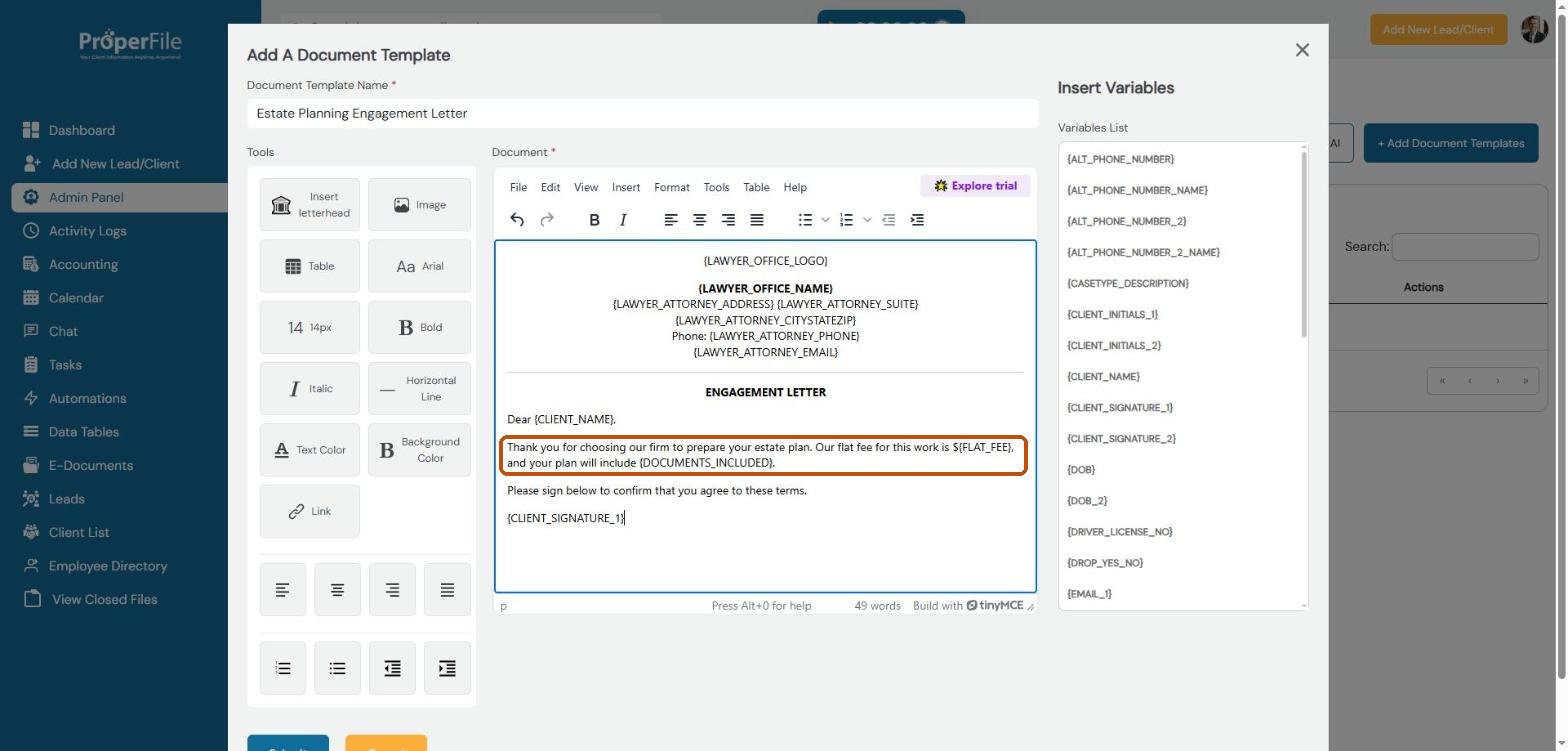
Add blanks you fill in when sending
For anything that changes from client to client, such as a fee, type your own name in curly braces, using capital letters and underscores, for example {FLAT_FEE}. When you send the document, ProperFile shows a box for each one under Placeholders so you can type the answer.
Tip: your custom fields and intake questions for this case type fill in on their own from the client’s answers, so you don’t have to type those in when sending.
Step 8
Save the template
Scroll down and click Submit. Your template now appears in the list.
Step 9
Edit or delete a template
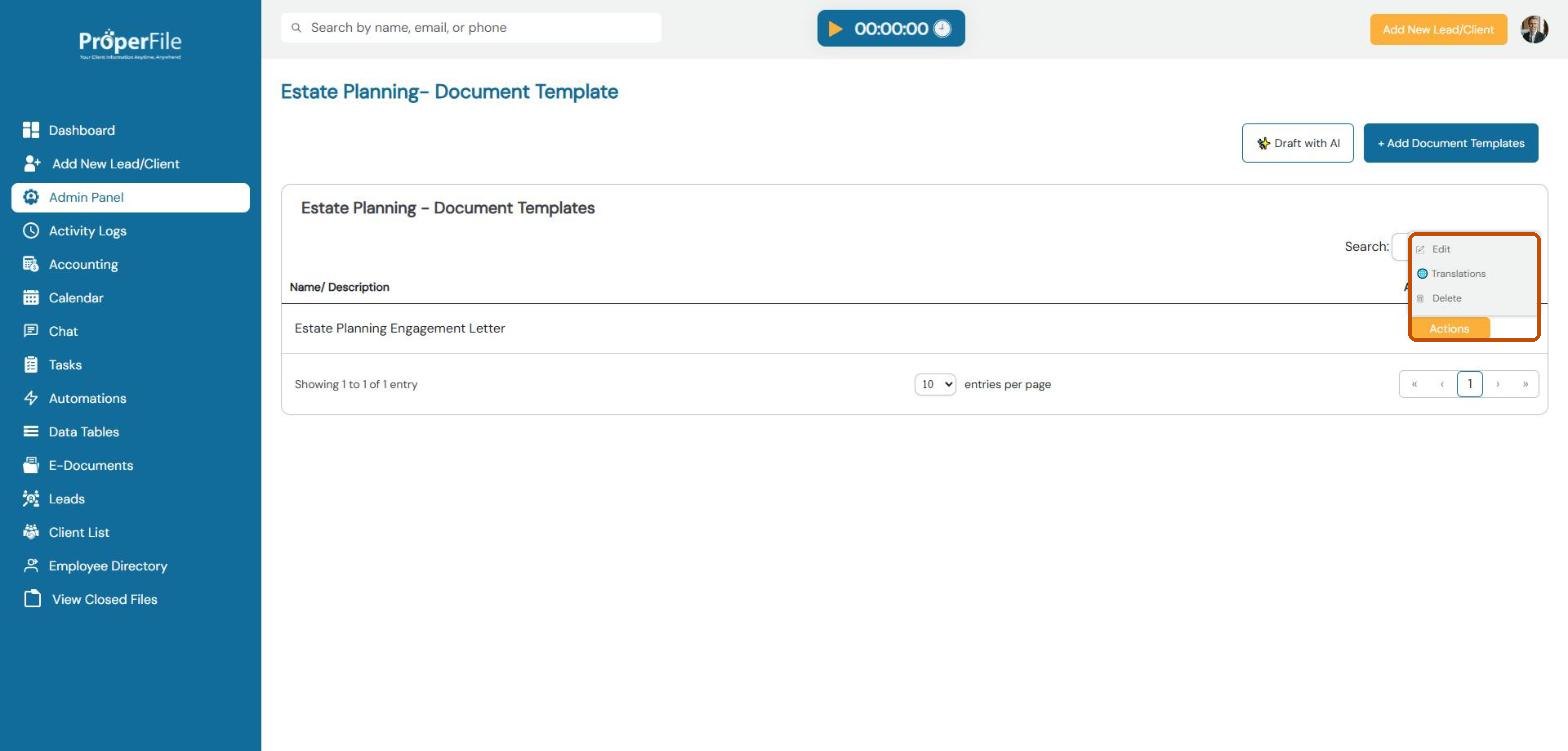
Click Actions next to a template, then Edit to change it or Delete to remove it.
Step 10
Check the translations
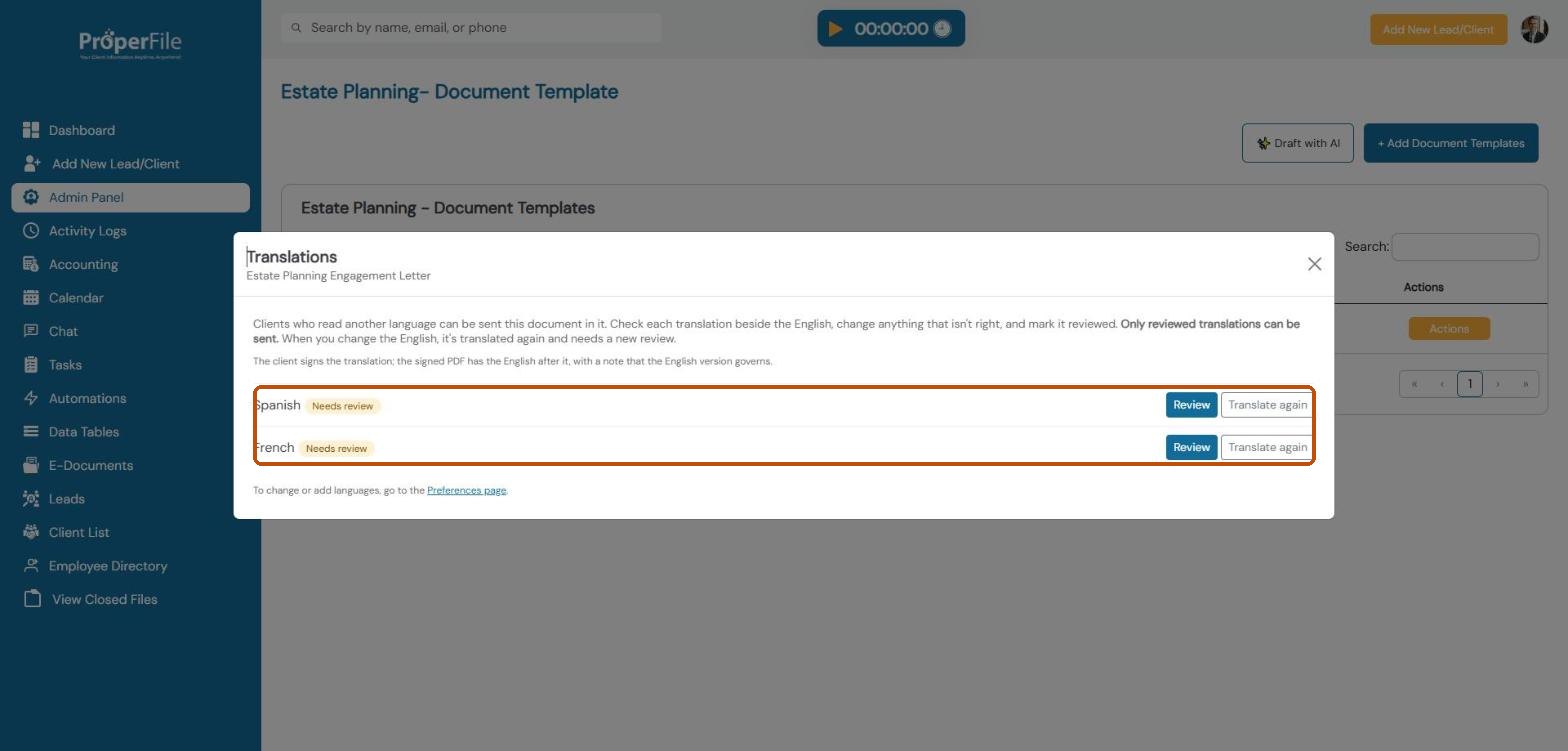
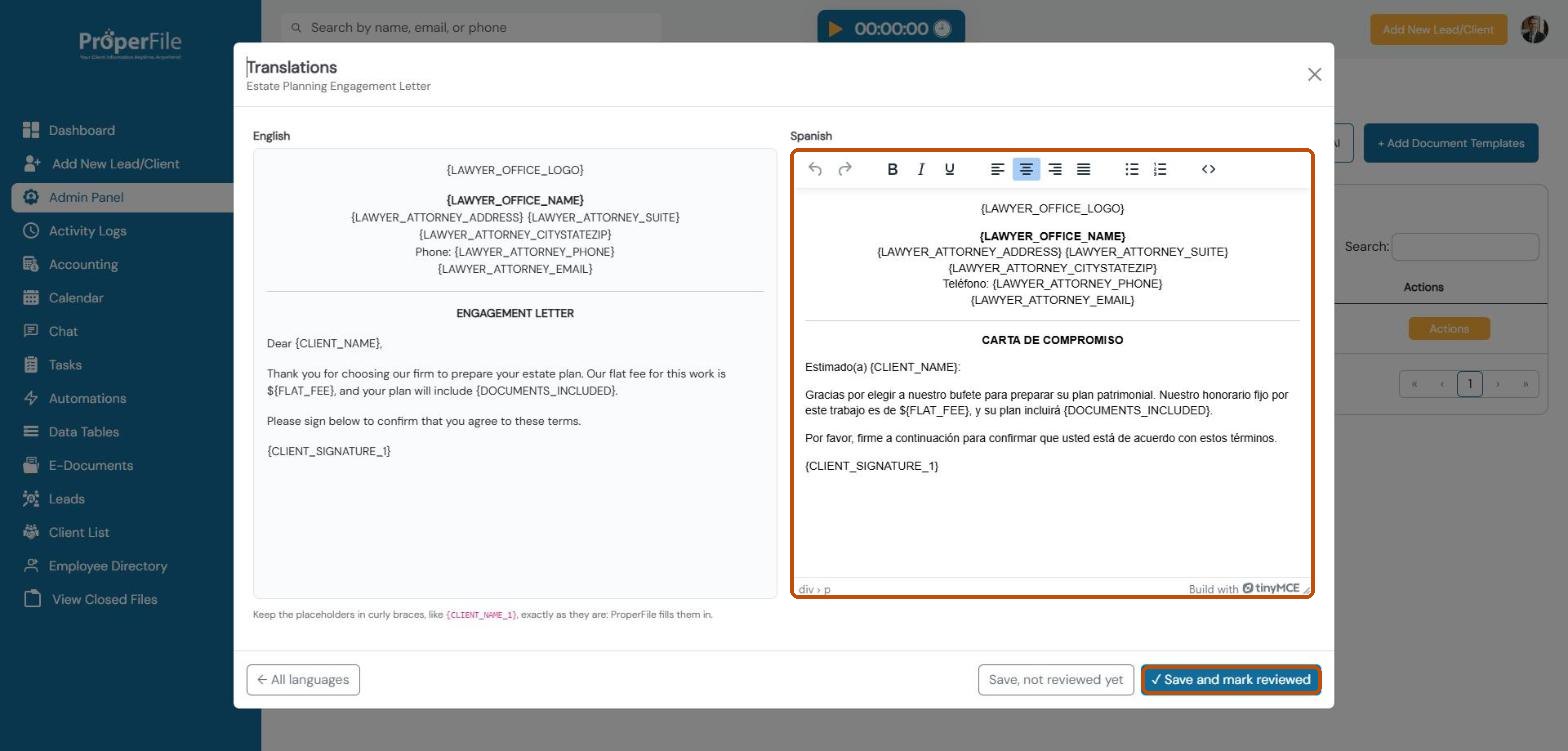
If your clients can use other languages (you choose them on the Preferences page), ProperFile translates each template for you. Click Actions, then Translations. Click Review next to a language, compare it with the English side by side, correct anything that isn’t right, and click Save and mark reviewed.
Tip: only reviewed translations can be sent. If you edit the English later, ProperFile translates it again and it needs a new review.
Step 11
Or let AI draft it for you
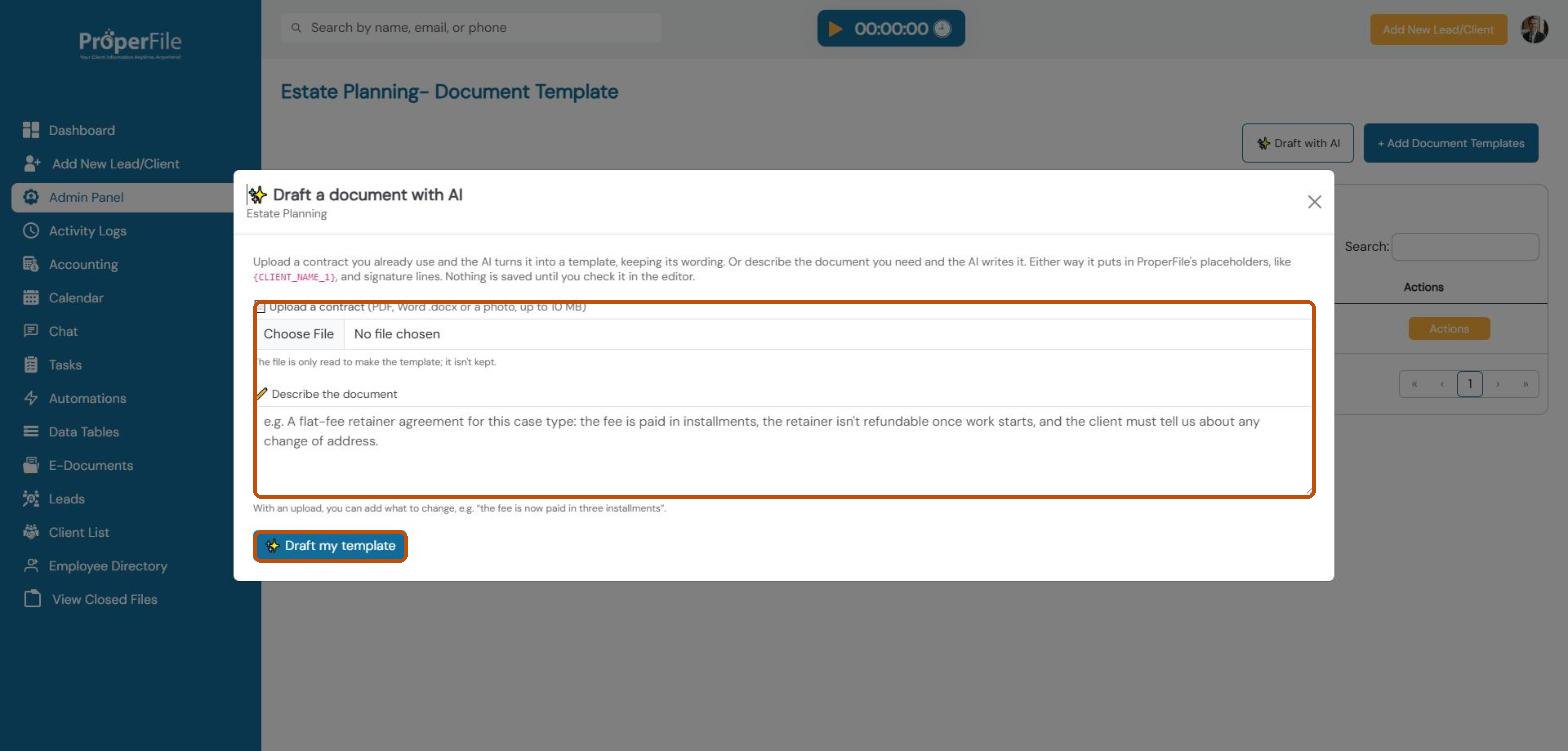
Click Draft with AI on the templates list. Upload a contract you already use (PDF, Word or a photo) and the AI turns it into a template, keeping your wording. Or describe the document you need and the AI writes it. Click Draft my template. Nothing is saved until you check the draft in the editor and click Submit.
Tip: always read an AI draft carefully before you send it to clients.