Tell ProperFile which courts you practice in, so only those show up when you add a court to a client’s case. ProperFile comes with a list of court addresses across the U.S.; you can add your own, fix an address or hide ones you never use.
Time needed: about 5 minutes.
Step 1
Open Court Selector
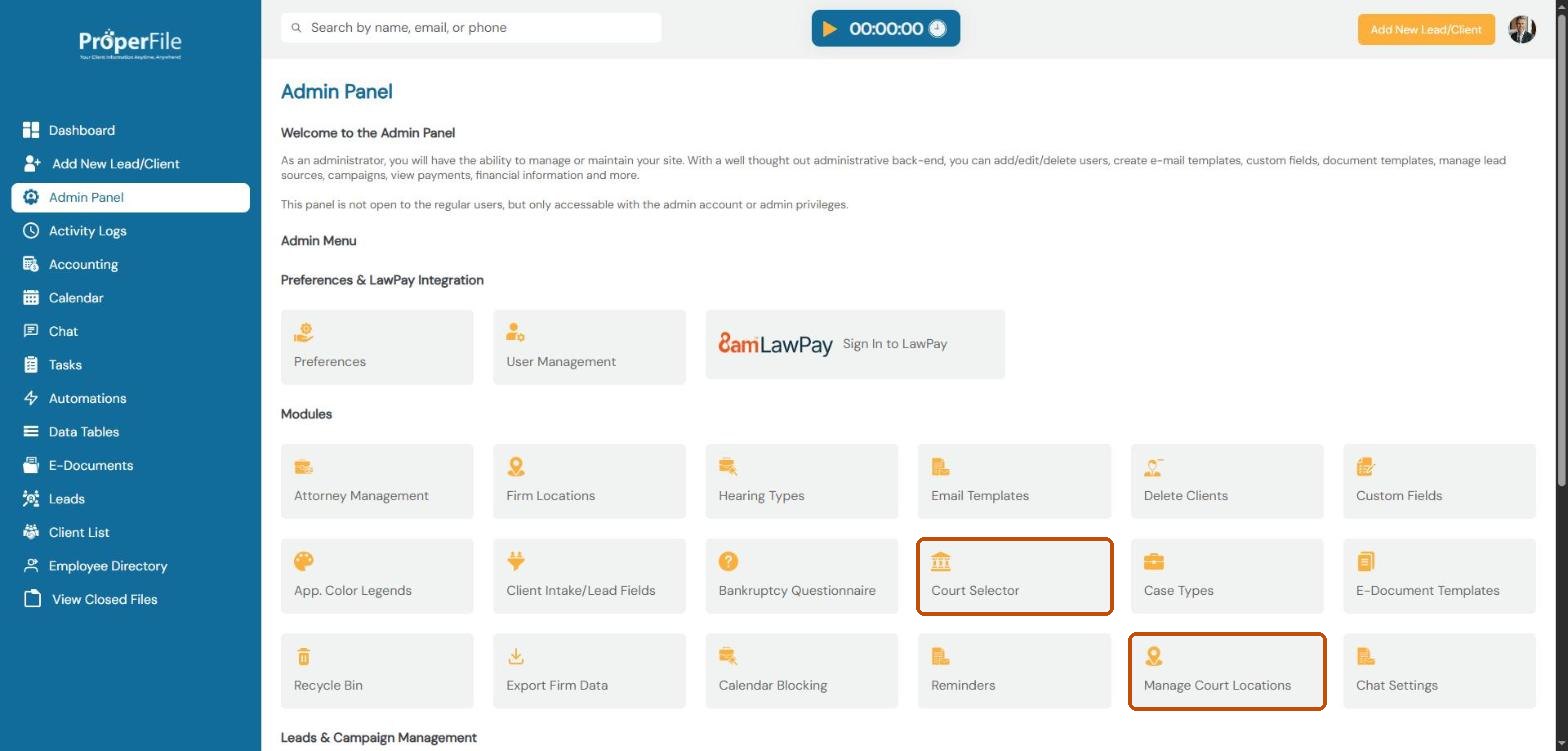
Click Admin Panel in the left menu, then click Court Selector. (You’ll use Manage Court Locations in step 3.)
Step 2
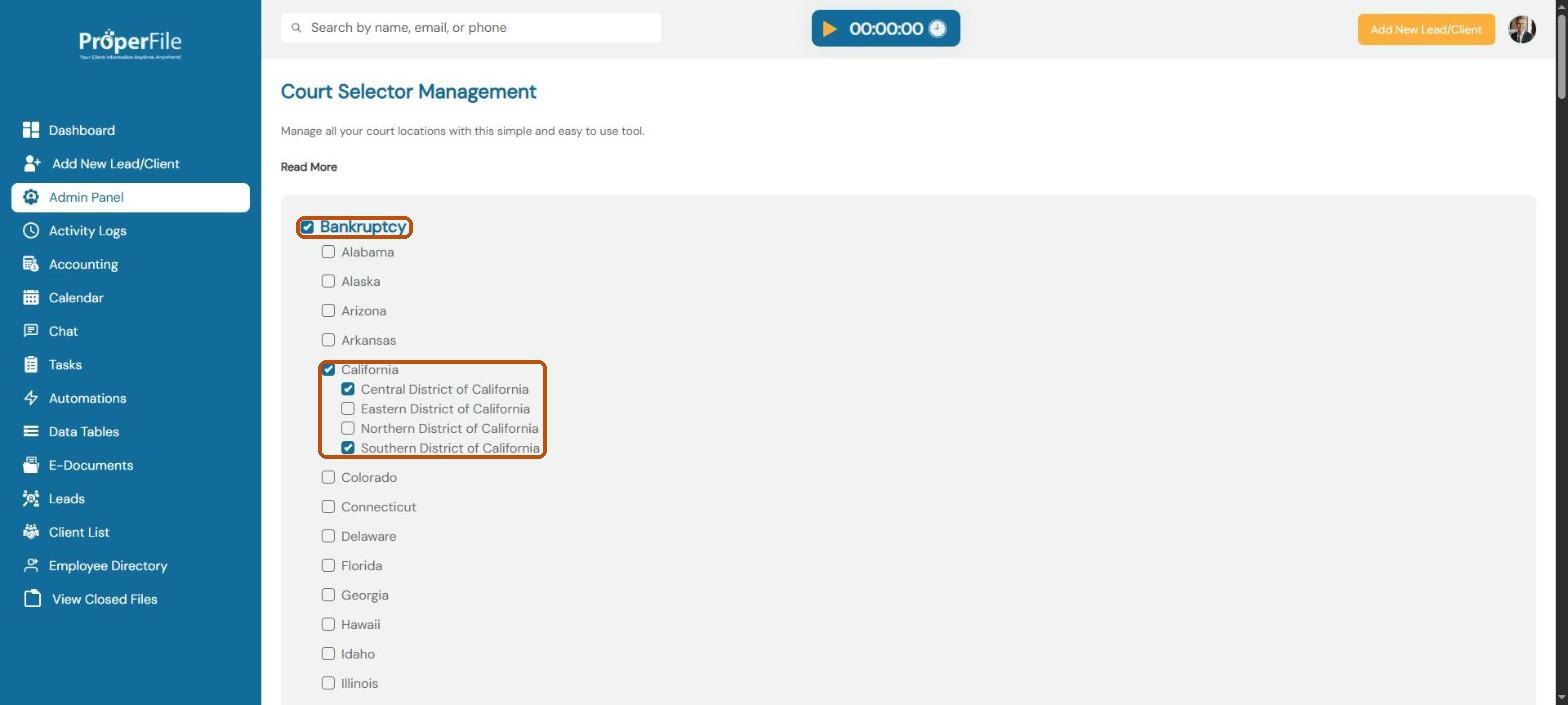
Tick the courts you practice in
The page has a section for Bankruptcy, one for Immigration, and one for civil, criminal, traffic, probate, family, juvenile and small claims courts. Tick a section, then tick each state you work in. For bankruptcy, tick the federal districts; for state courts, tick the counties.
Tip: there’s no Save button: each tick is saved straight away.
Step 3
Open Manage Court Locations
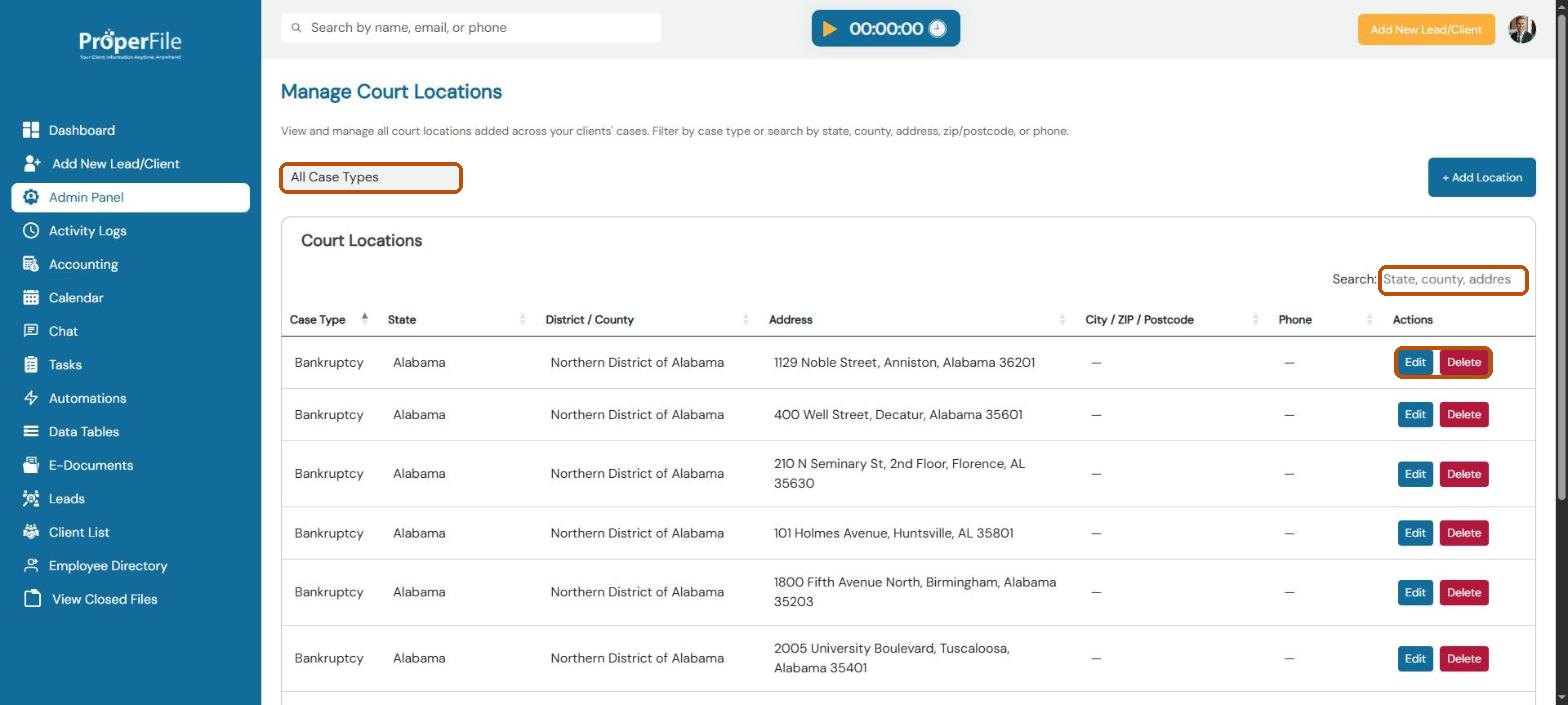
Go back to the Admin Panel and click Manage Court Locations. You’ll see every court address, with its case type, state, district or county, address and phone number. Use the case type list on the left to filter, or the Search box.
Step 4
Find a court
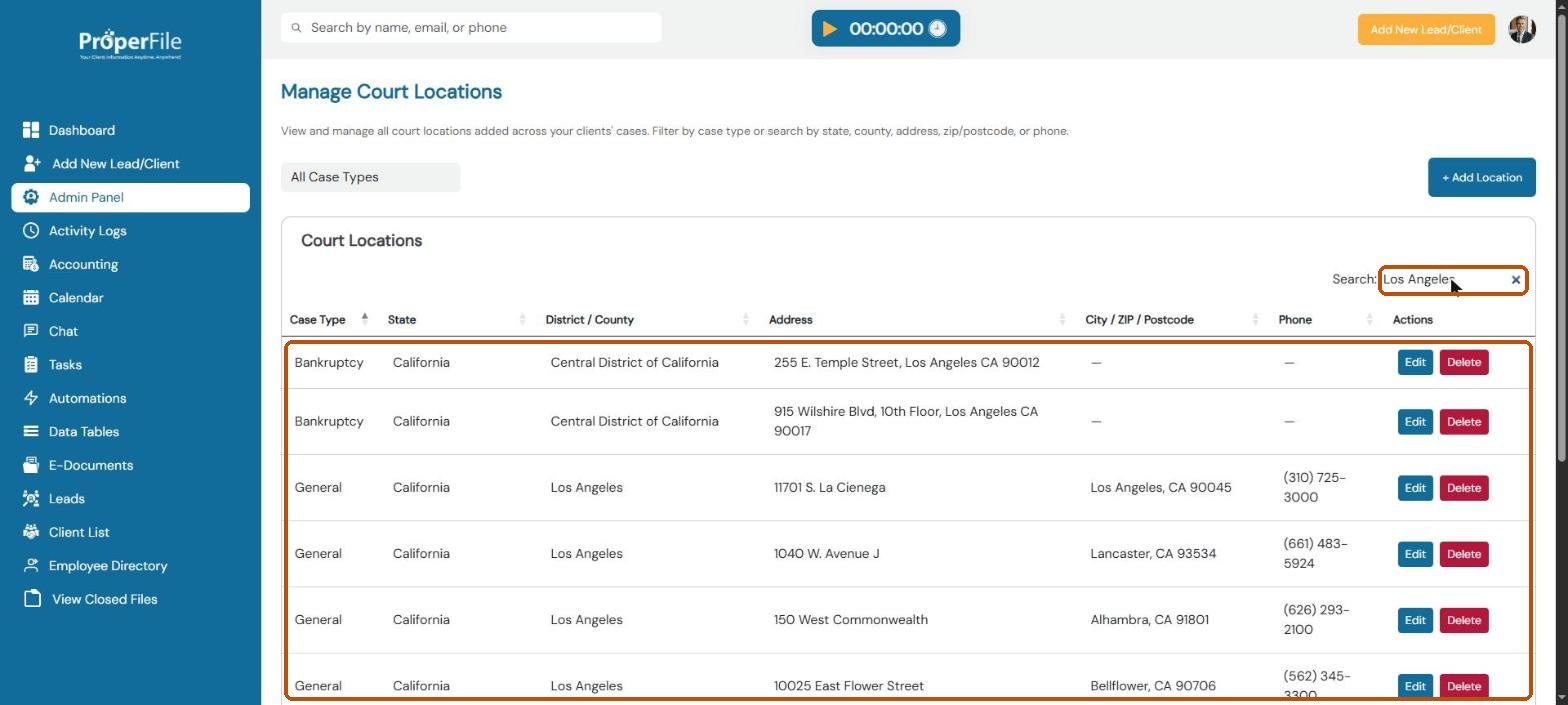
Type a state, county, city, address, ZIP code or phone number in Search, for example Los Angeles.
Tip: click Edit to correct a court’s address or phone; your change applies to your firm only. Delete hides a court you never use.
Step 5
Add a court that’s missing
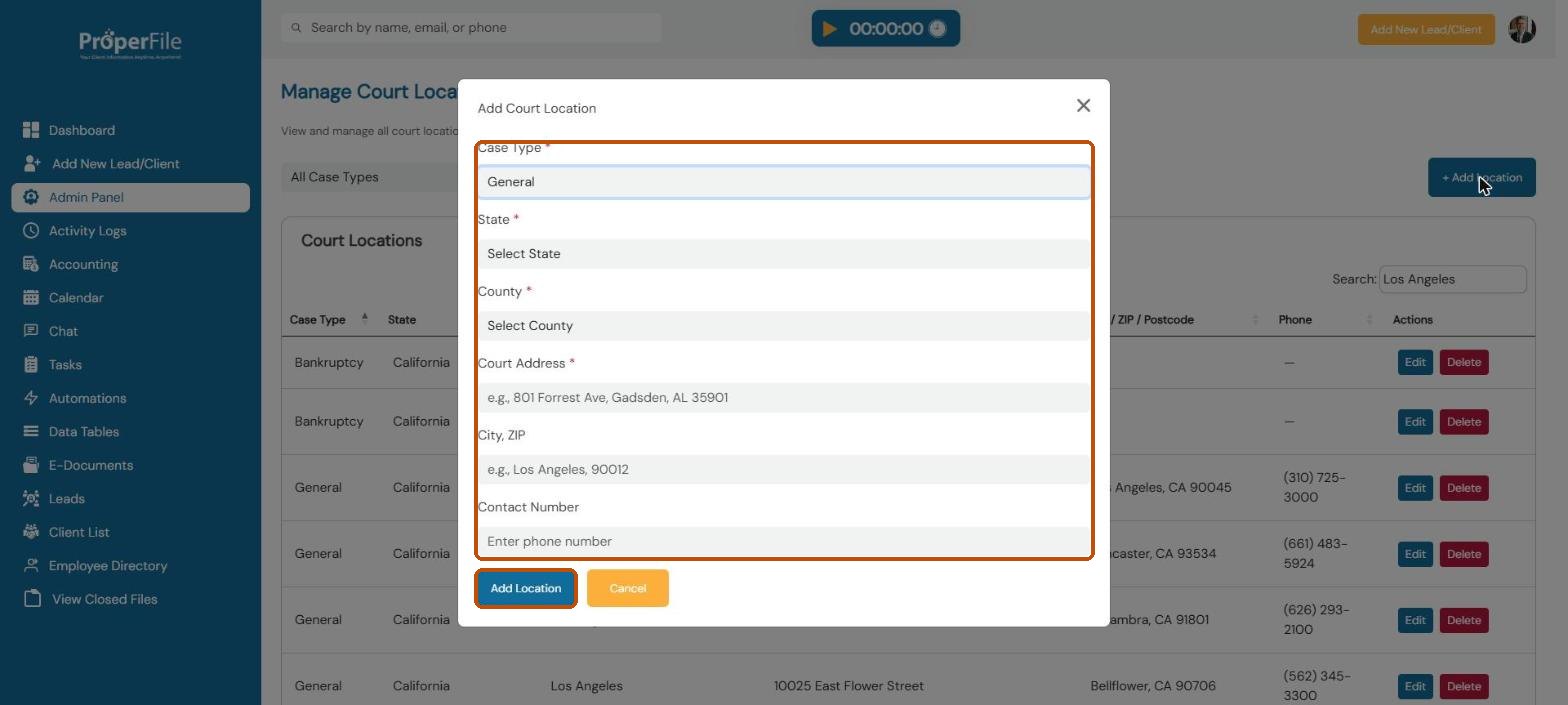
Click + Add Location. Choose the case type (Bankruptcy, Immigration or General), then the state and county or district. Type the court’s address, city and ZIP, and phone number, and click Add Location.
What’s next
Keep going
Next, set up automatic Reminders for signatures and hearings. All guides are in the Help Center.